4 Photoshop AI
Photoshop AI
This chapter will review some of the various artificial intelligence options that are found in Photoshop using Adobe Sensei and Adobe Firefly. I will start this chapter demonstrating Firefly’s Generative Fill option, that allows you to add, extend, or remove content from your images non-destructively using simple text prompts. At the original time of this writing in mid-2023 Generative Fill had only been added to Photoshop’s Public Beta app, but has now been added as part of the regular Photoshop application, and within a short period of time, Generative Expand was also added to Ps as a simplified means to extend an image by using the Crop tool.
Adobe Firefly
AI is not new to Photoshop as it has been in use with Adobe Sensei for options such as filling in pixels and creating selections, which I will also explore in this chapter. The most exciting addition to Photoshop, however, are the Generative AI options of Generative Fill and Generative Expand. This AI technology was introduced and implemented in a relatively short period of time. As a member of the Photoshop Pre-Release group, I had the opportunity to explore these new features before they made it into the Public Beta app, and also had the chance to explore the technology in Adobe Firefly. Firefly is a standalone web-based app where you can generate Text to Image, Text Effects, Generative Fill and Generative Recolor. Firefly is similar to other AI apps such as Midjourney and Dall-E, just two of the many AI apps used to generate photographic imagery. Firefly has been integrated into various Adobe apps such as Photoshop. Essentially Firefly is the egg to Ps’ chicken, or the chicken to Ps’ egg, depending on whether your glass is half empty or half full.
How Generative Images are Created
The Generative AI options are exciting and can be extremely useful but we just see them on the surface if you will, for what they do. However, there is much to know about this technology that occurs behind the scenes that we must have an understanding of to allow us to AI responsibly. First, let’s understand how AI images are generated.
When a user keys in a Prompt, the AI engine uses a neural network to create, or generate a series of 3 to 4 images depending on the app. This network references images that it has “seen” online to generate an image based on the descriptive prompt. Let’s think about it this way, if you wanted to find an image of a planet such as Saturn you might open a web-browser and type in “Saturn”, and you will be presented with a wealth of information on Saturn, including vehicles. It is these images that the neural network would use as references to generate a planet of its own. At the same time, this is also what has given the use of AI in art a bad name. Artists who have spent hours photographing, drawing, painting, sculpting a piece of art, and then had shared this work on the internet; these images become a part of that search. One can then say that their copyrighted art was possibly used as a reference for an AI generated image, that may have taken just a few seconds to produce by a neural network. Adobe’s Text to Image or Generative Fill work the same way, however, they only reference works in the Public Domain [non-copyrighted] and Adobe Stock, so any referenced image has an origin. Adobe was a bit late to the AI game because they wanted to do it right by setting standards for the use of AI in their apps, and in doing so all generated images created in Photoshop are suitable for commercial usage.
Setting standards for responsibility and transparency [this paragraph was copied directly from helpx.adobe.com]
Also introduced in Photoshop 25.0 (September 2023 release)
With this release of Photoshop, you’ll have access to a generative AI model that is ethically sourced via Adobe Stock.
Through efforts like the Content Authenticity Initiative and the Coalition for Content Provenance and Authenticity, Adobe is standing up for accountability, responsibility, and transparency in generative AI and Firefly.
What this means is Photoshop will automatically append Content Credentials to images generated using Generative Fill and Generative Expand and exported as PNG, JPG, or “Save as”, to let you and others know an image was created or edited in Photoshop using Firefly’s generative AI technology.
Generative Credits
These credits enable the use of the Generative options in the Adobe apps that you have access to. Generative credits range from 25 – 1000 per month based on the type of plan that one has purchased, and they refresh each month but do not accumulate. The Enterprise plan that COD students have access to offers 1000 credits per month. One credit is used each time a user clicks on the Generate button that they have access to. Despite the creation of three to four images with each click, only one credit is used. In the future, more credits may be used as image resolutions and quality become greater. When a user runs out of credits in a one-month period, the ability to generate new images does not stop, it merely slows, so it may take quite a bit longer to generate new images with each click.
Generative Fill
Before starting to work with Generative Fill, ensure that you are connected to the internet as this option requires cloud-processing. You can use it to add to an image with a text prompt, but it works equally well without a prompt.
You may have noticed the new floating Contextual Task Bar [Figure 4.1] that shows in the application with shortcuts specific to the current tool, which is a nice addition as it places tool specific options anywhere you want in the image area, versus having to move the cursor to the top of the window or toolbar to access options. You can enable and disable the bar through the Window Menu, Window > Contextual Task Bar. Using the task bar is one way that you can apply Generative Fill directly to an image with the other using the menu bar option of Edit > Generative Fill…
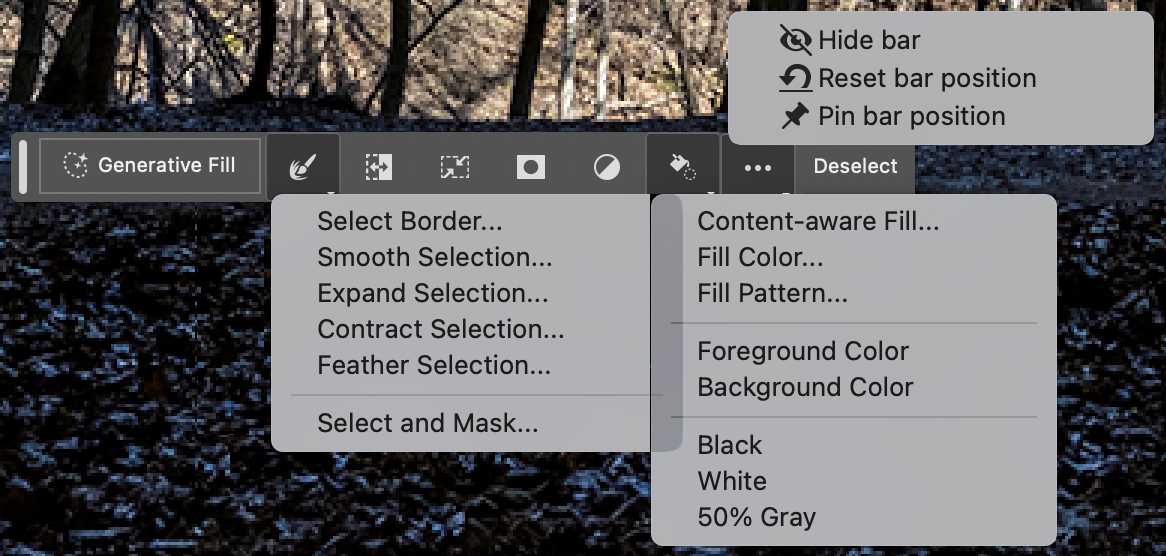
Contextual Task Bar options for Selections [Figure 4.1 left – right]:
Generative Fill: This option will show when you make a selection on your image. Click on it to enable a prompt field.
Modify Selection: This option has many options to modify the existing selection.
Invert Selection: Use this option to invert the current selection.
Transform Selection: This option will apply a transform box around the selection to modify the selection but not the pixels.
Create Mask from Selection: Allows you to add a layer mask made from an existing selection.
Create New Adjustment Layer: Allows you to add a new Adjustment Layer with a mask made from an existing selection.
Fill Options: Allows you to apply various fill options to a selection.
More Options: Allows you to choose how to manage the Contextual Task Bar.
Deselect: Allows you to deselect the current selection. CMD / CTRL + D
How-To: Using Generative Fill to Add to an Image
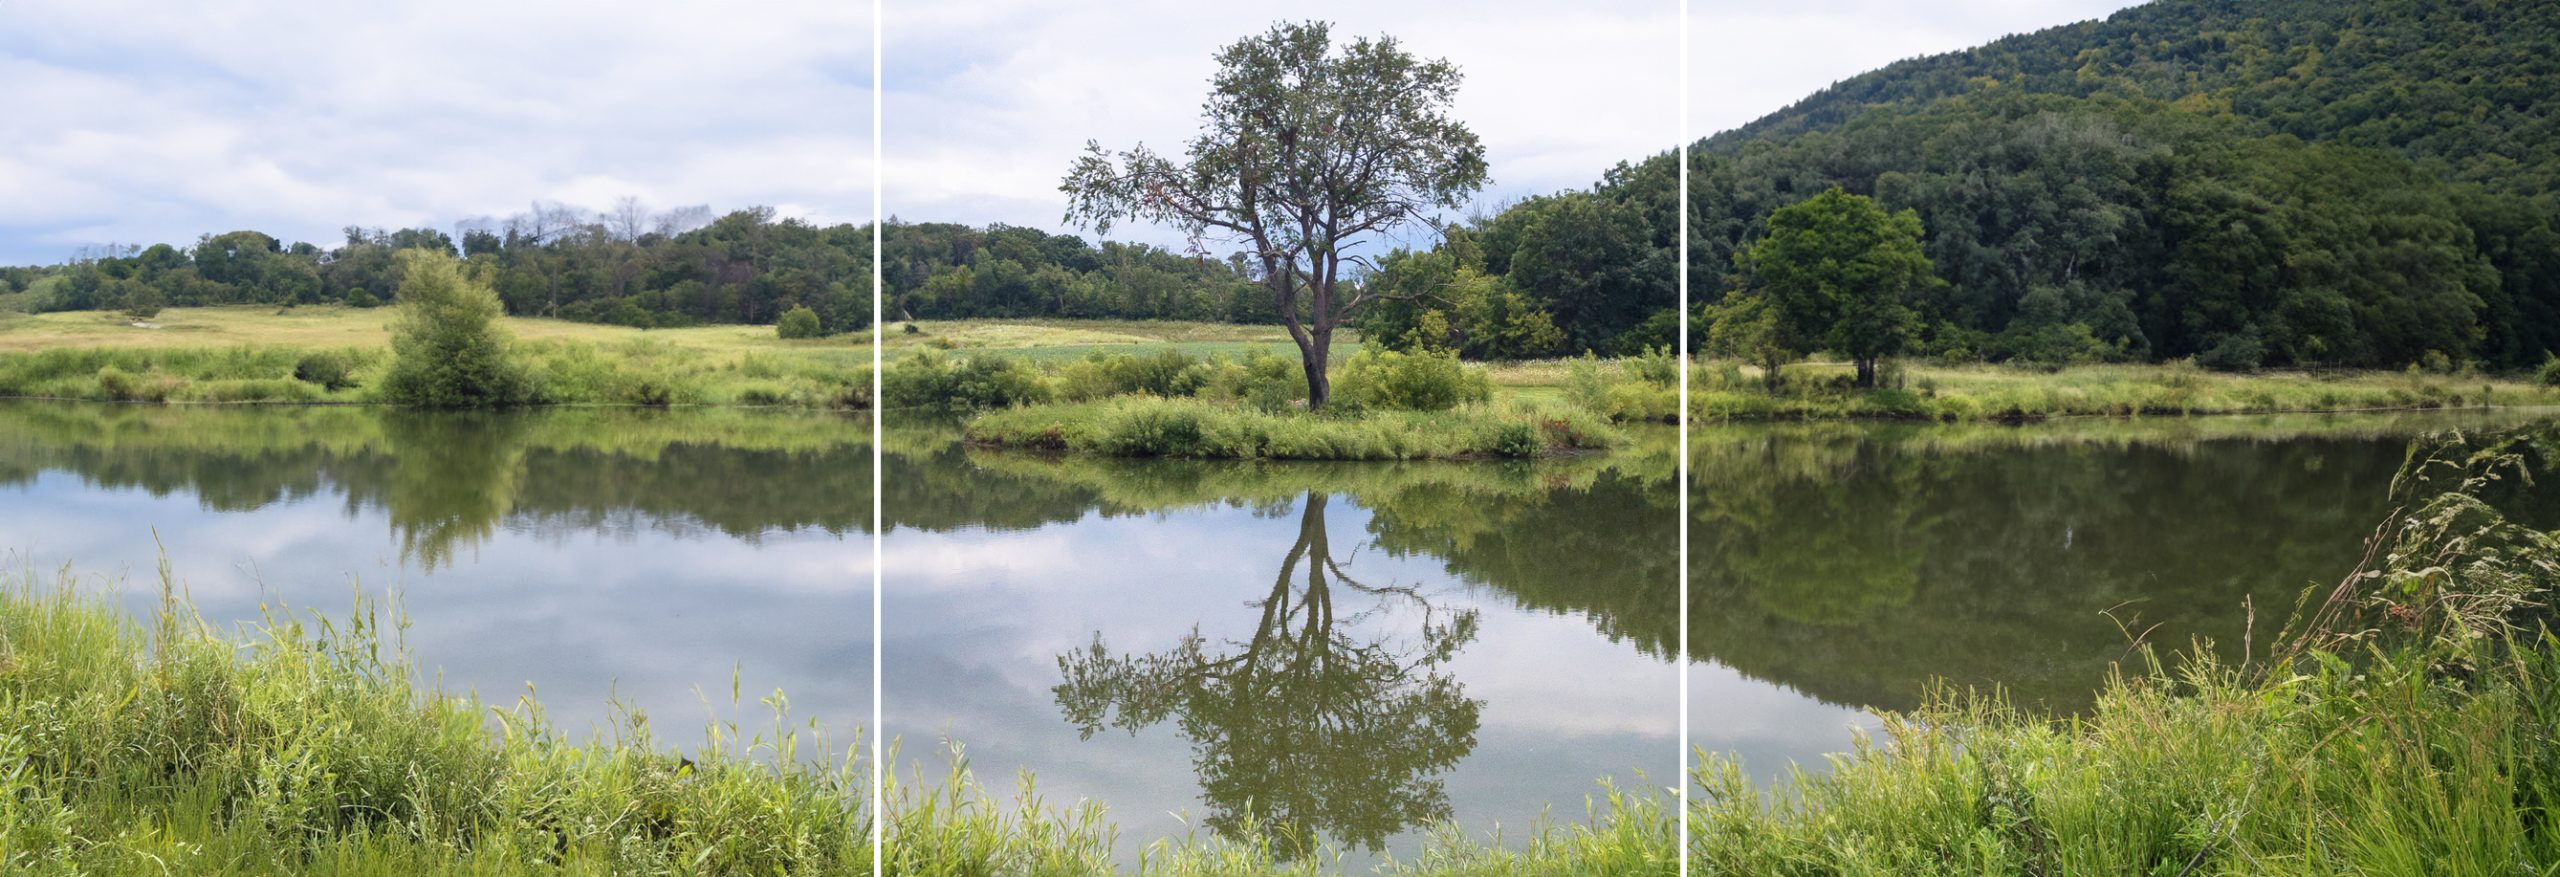
Step 1: Add Canvas To add to the photo below by Jim Waters, I first increased the overall canvas size by using the Image > Canvas Size menu option and added to the left side. The Rectangular Marquee was used to make a simple selection over the newly added area, with the selection also covering a portion of the original image. When using the selection in this manner the Generative Fill option shows in the Contextual Task Bar. Tip: You can also increase the canvas and add to the background with the Crop tool [see Generative Expand below].
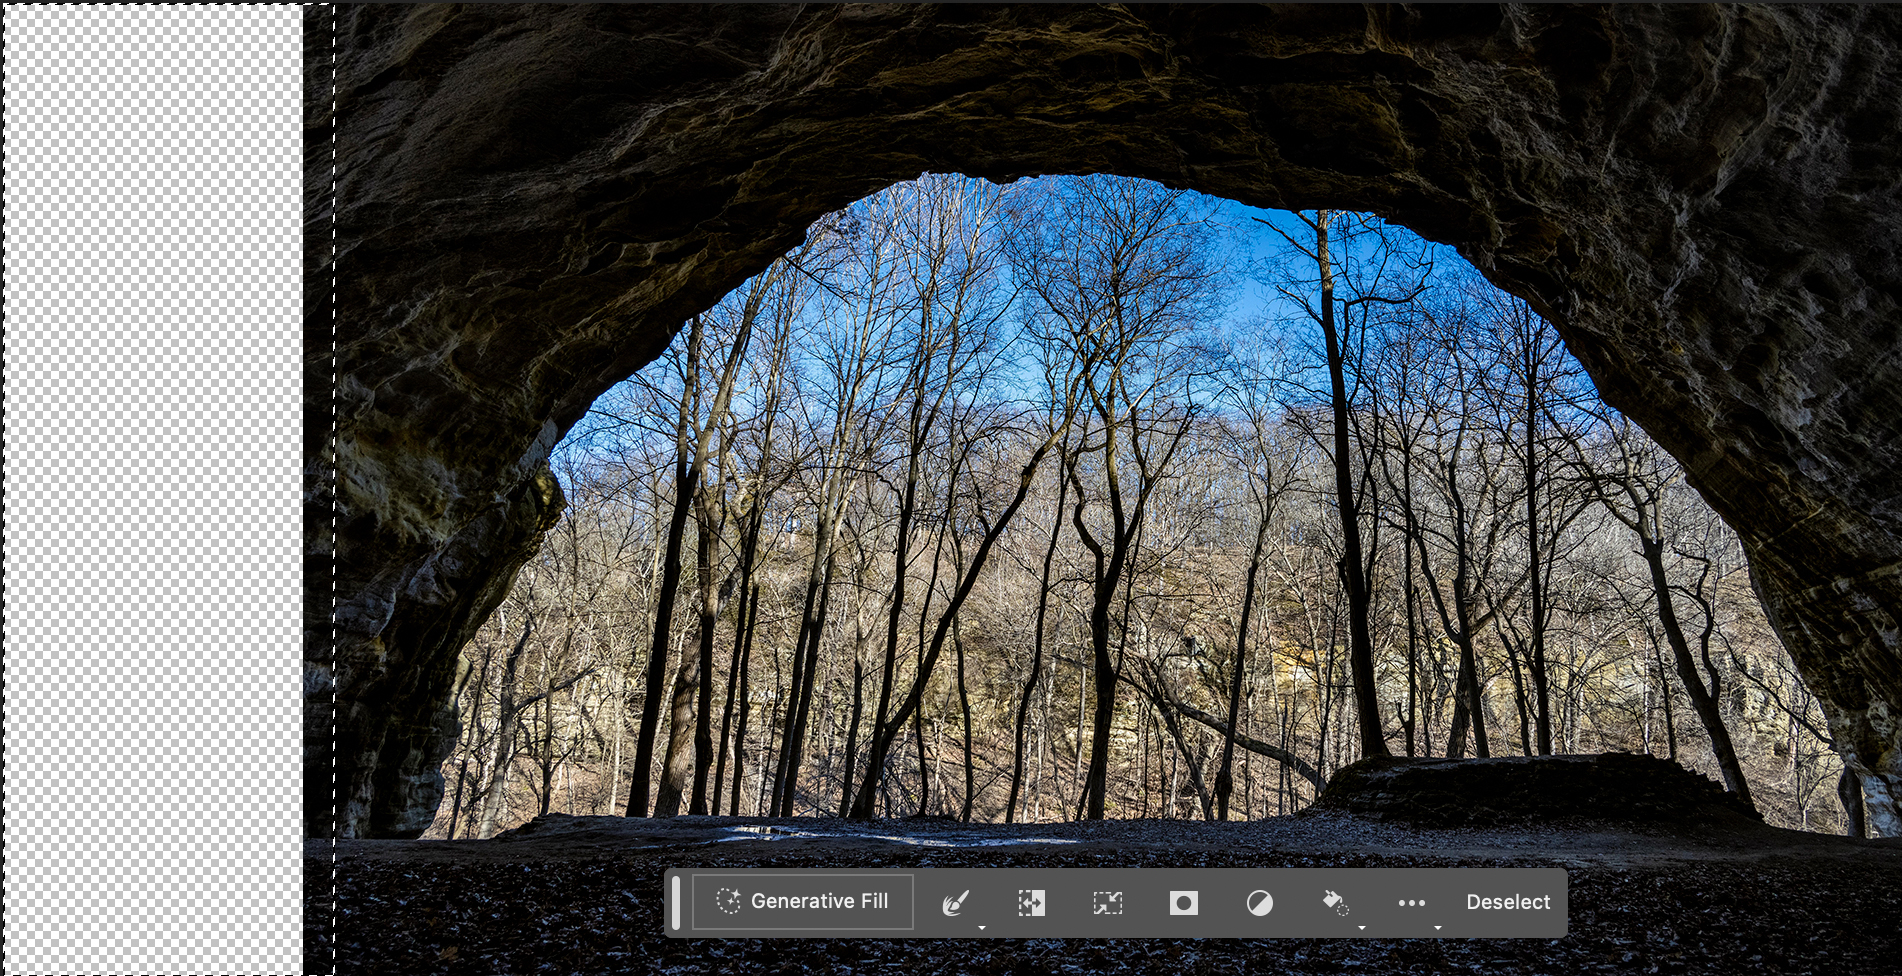
Step 2: Generative Fill Prompt When you click the Generative Fill button you will be asked to type a descriptive prompt of the type of image that you would like to fill the selection with, but you can also leave the field blank to increase the current background. When the field is left blank Ps will use the pixels from the original image to generate new pixels of a similar nature to fill the new canvas area. I have left the field blank for this selection and clicked on the Generate button.
Troubleshooting: When the prompt description field is left blank Ps should automatically add to the background, however, sometimes even AI can become confused and may need a bit of prompting. You can add a . [period] in the field to assist with the background extension prompt. I have not been successful in learning why adding a period works, and the closest explanation that could somewhat be legitimate, is that it is a carryover from the days of DOS, at a time when computer code was king.

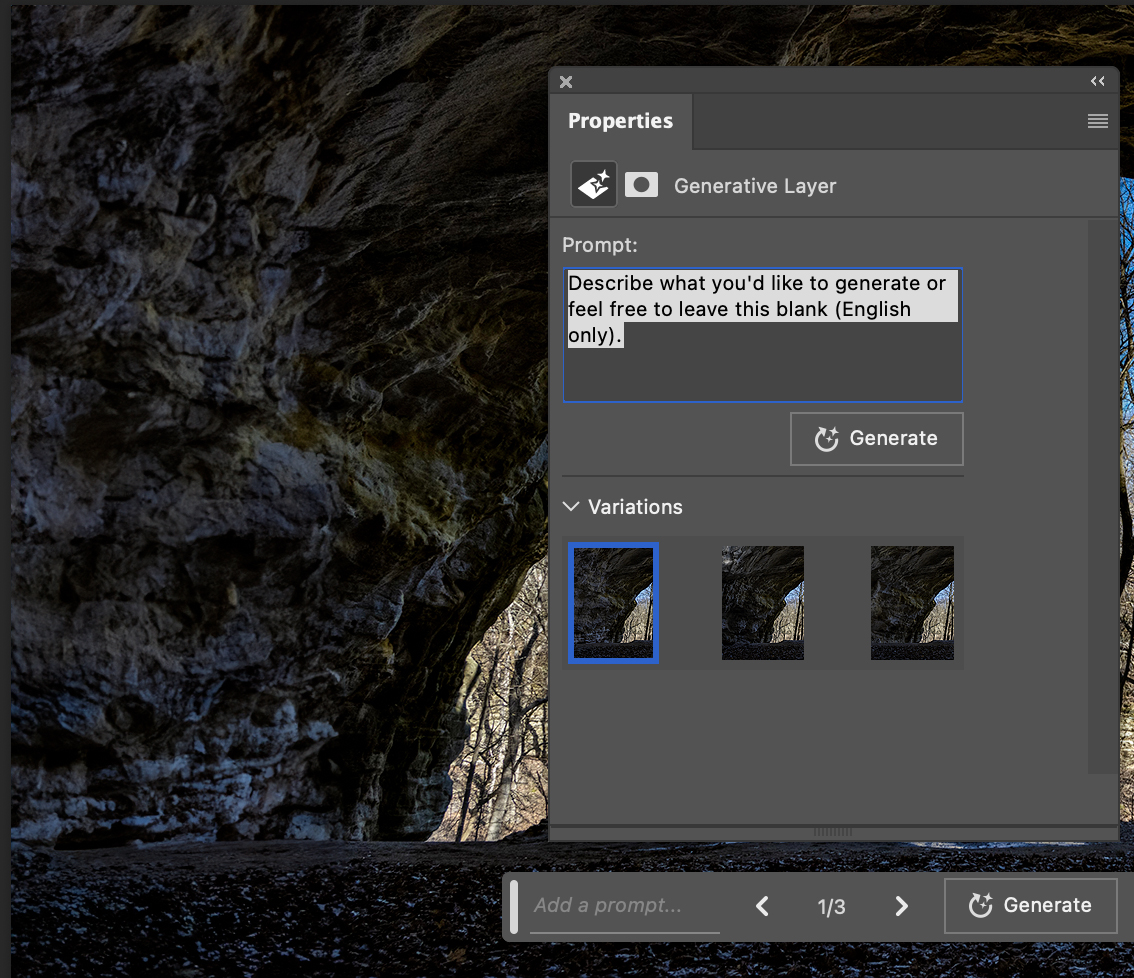
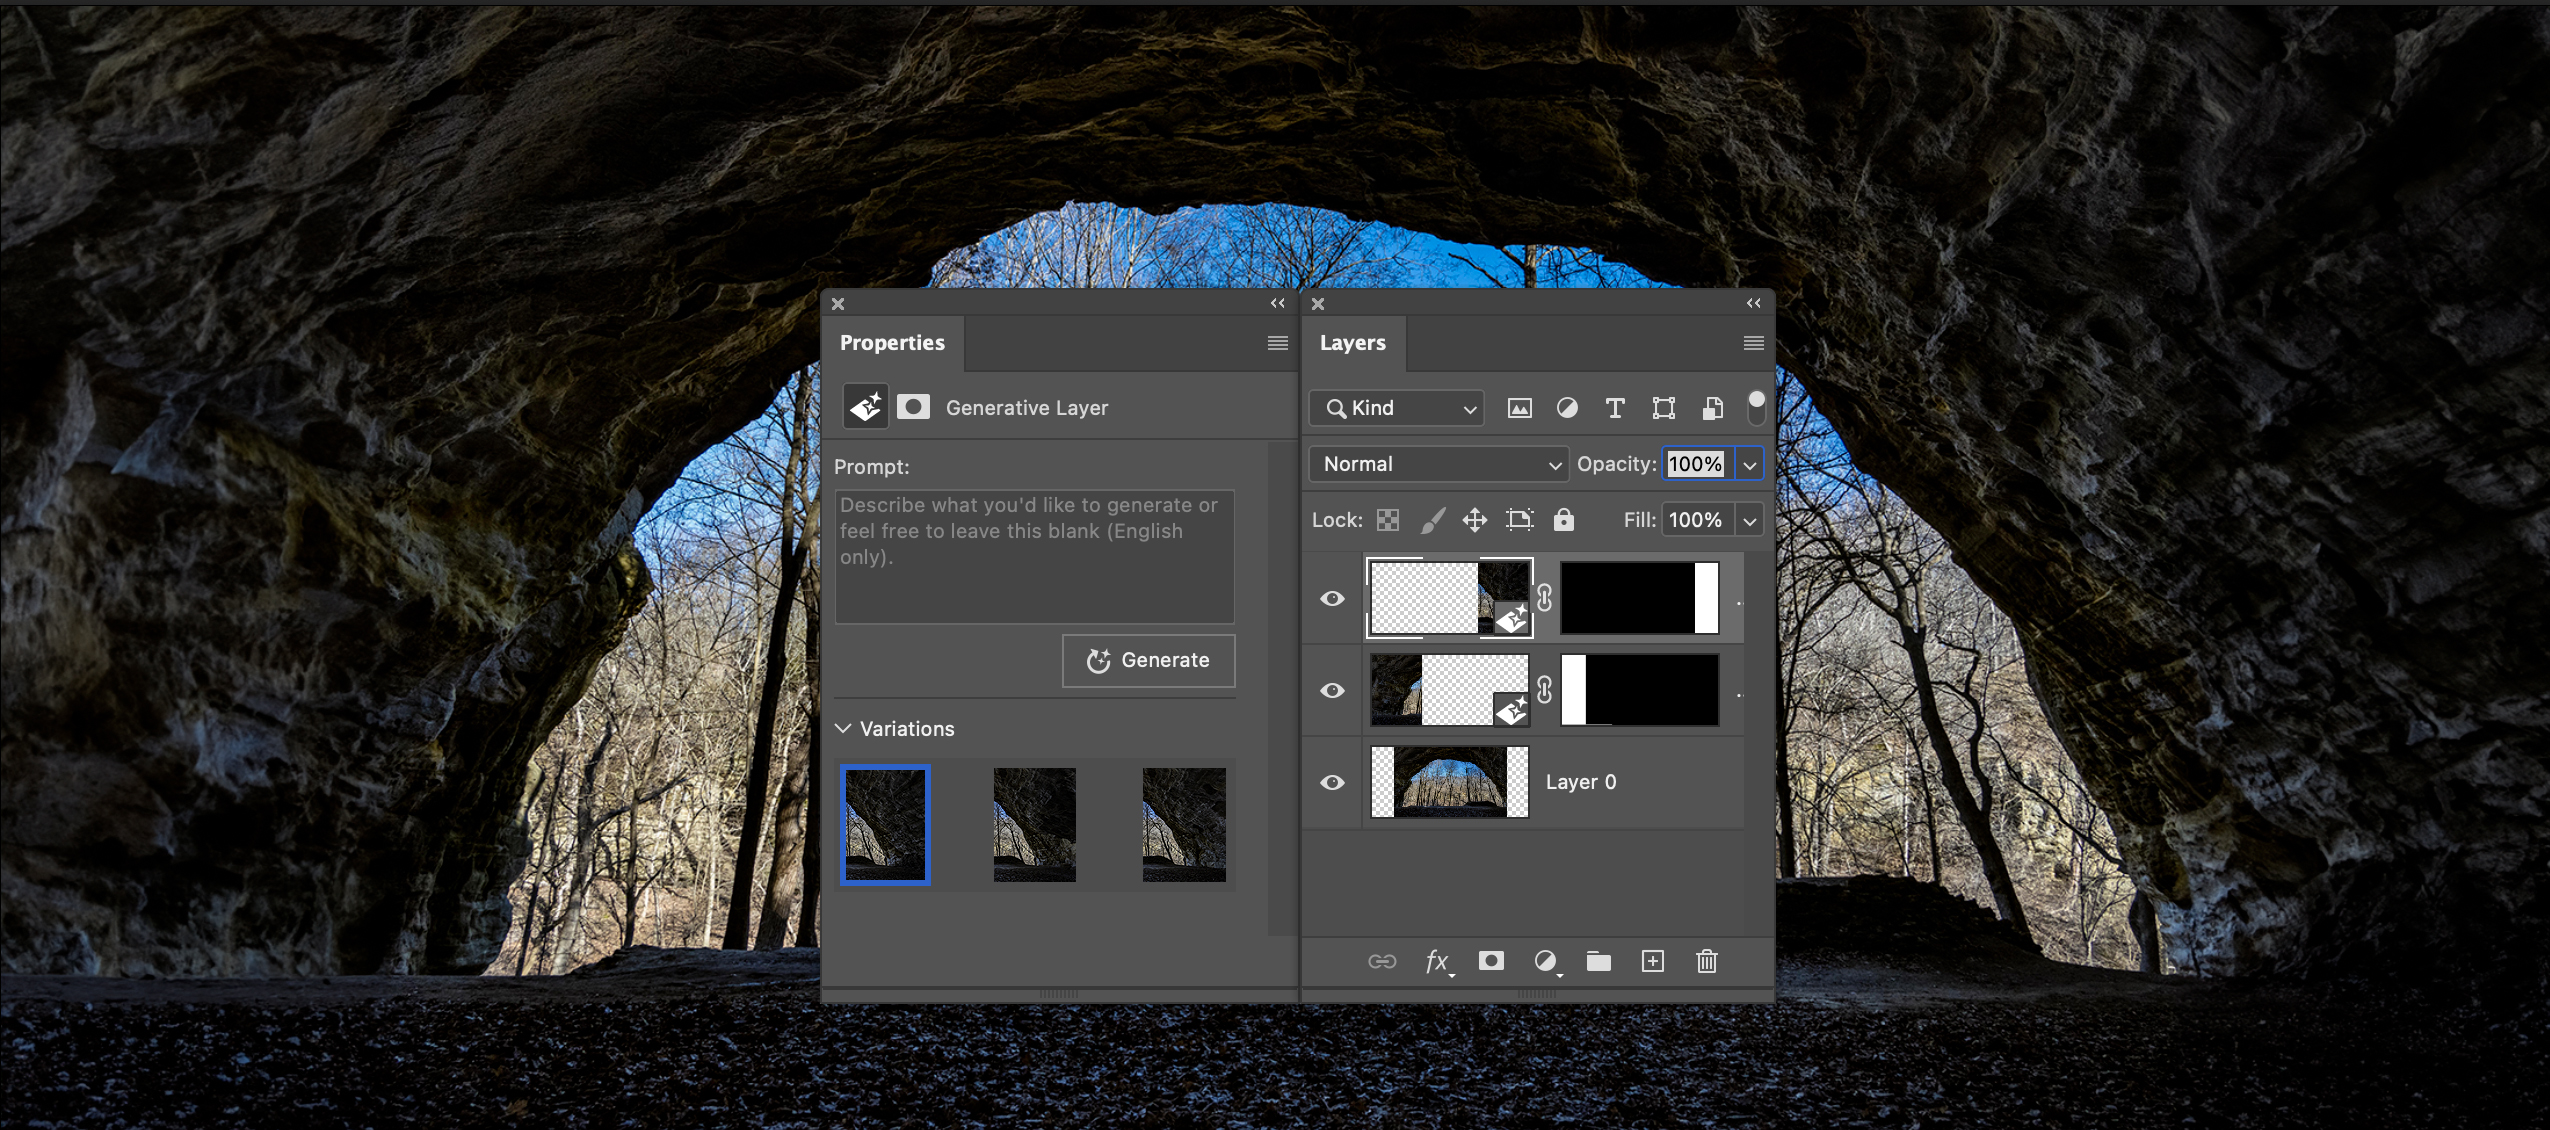
Step 3: Variations Photoshop generates three Variations or a prompt for the selected area that you can cycle through in the Contextual Task Bar, or through the Properties panel. If you find that none of the Variations are suitable to your creative vision, you can add a prompt [or not], and Regenerate for another set of Variations.
You can continue this process of regeneration, by simply click again on the Generate button, which will create a new set of three image options for you to choose from. You can also revise or replace the prompt for more options.
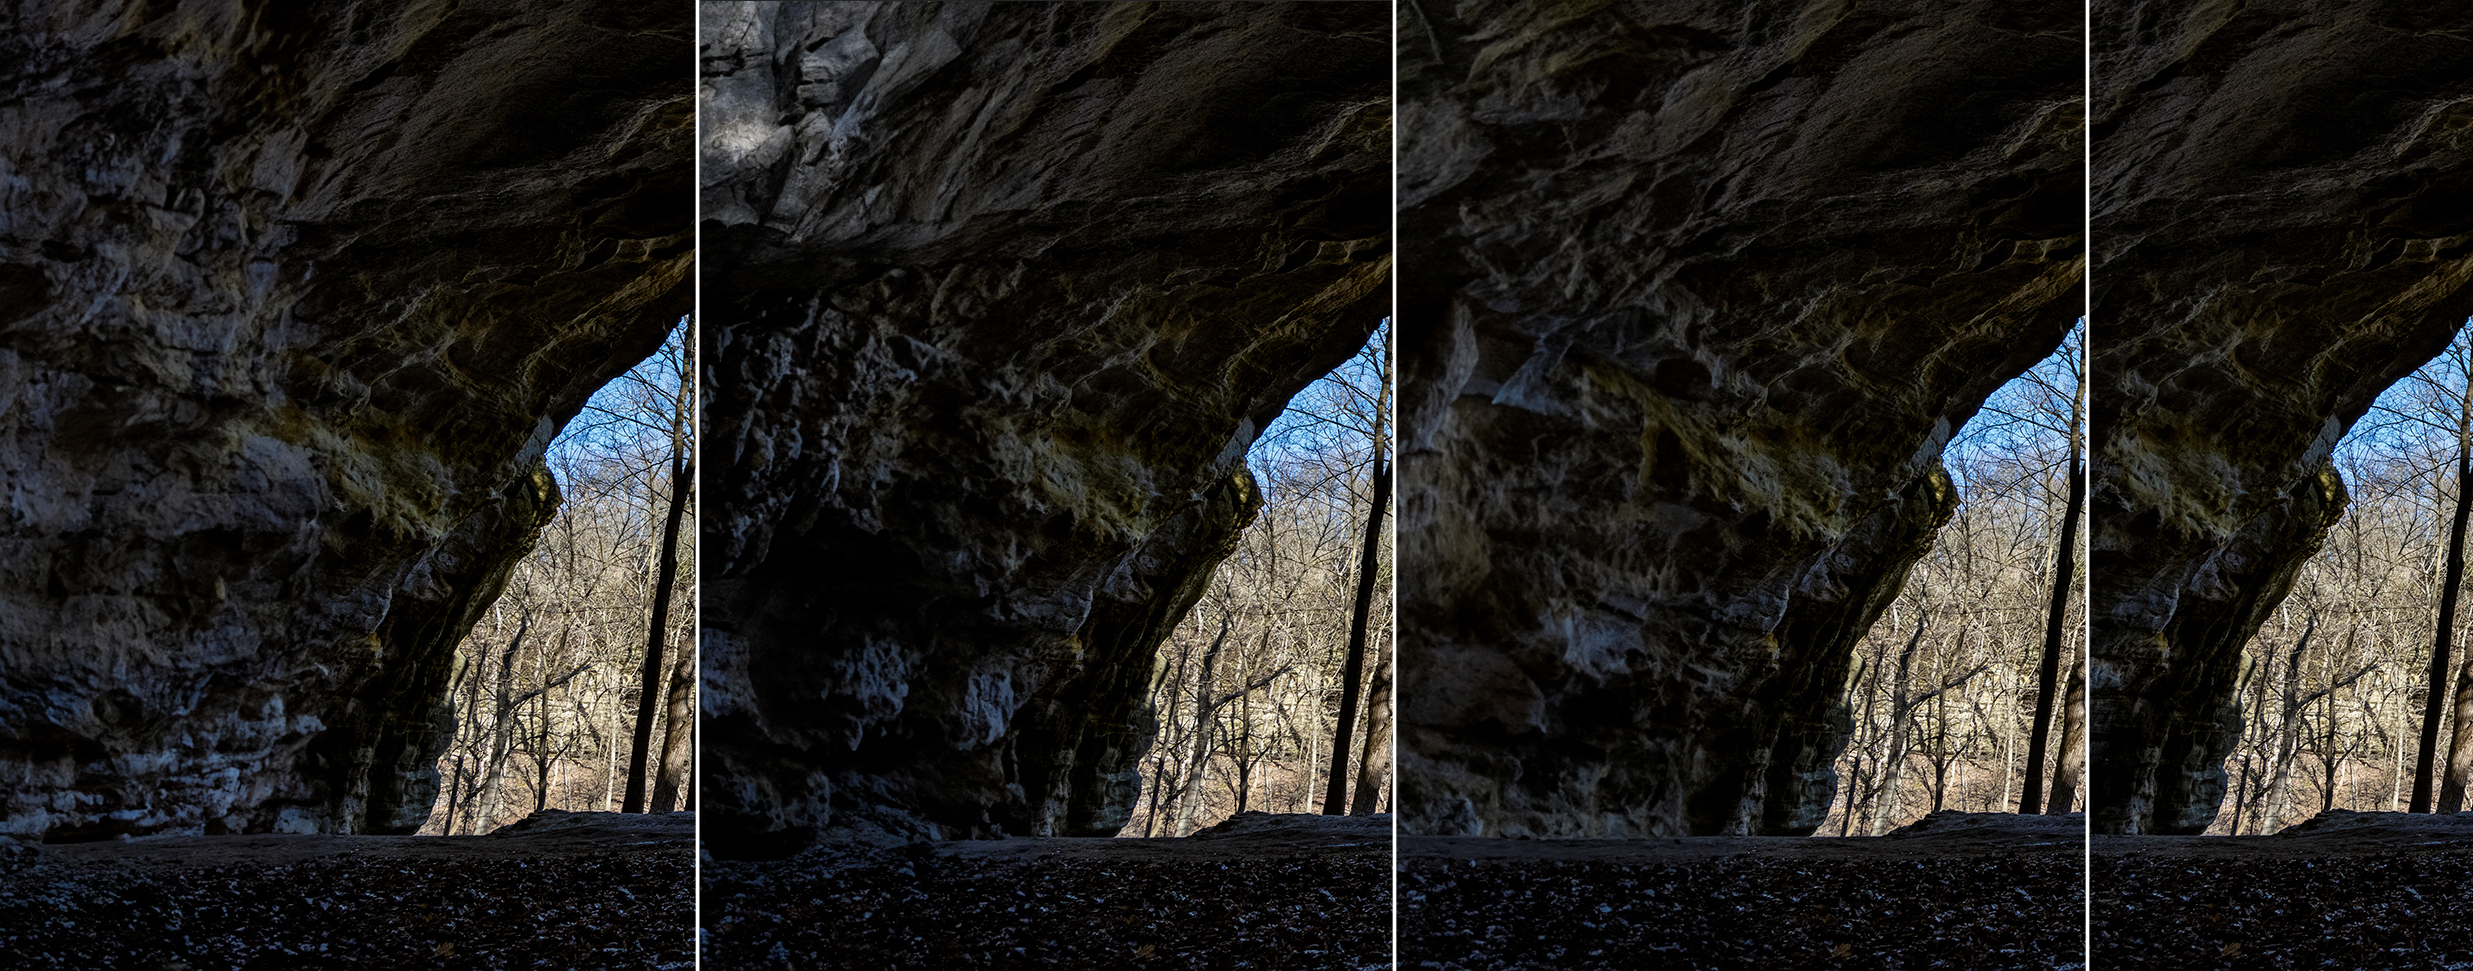
Additional Editing: For the image below I added additional canvas to the right side and once again generated new pixels with a rectangular selection. When using Generative Fill, the edits you add are non-destructive because they are added as new layers with the selections used to create a layer mask.
Add a Prompt
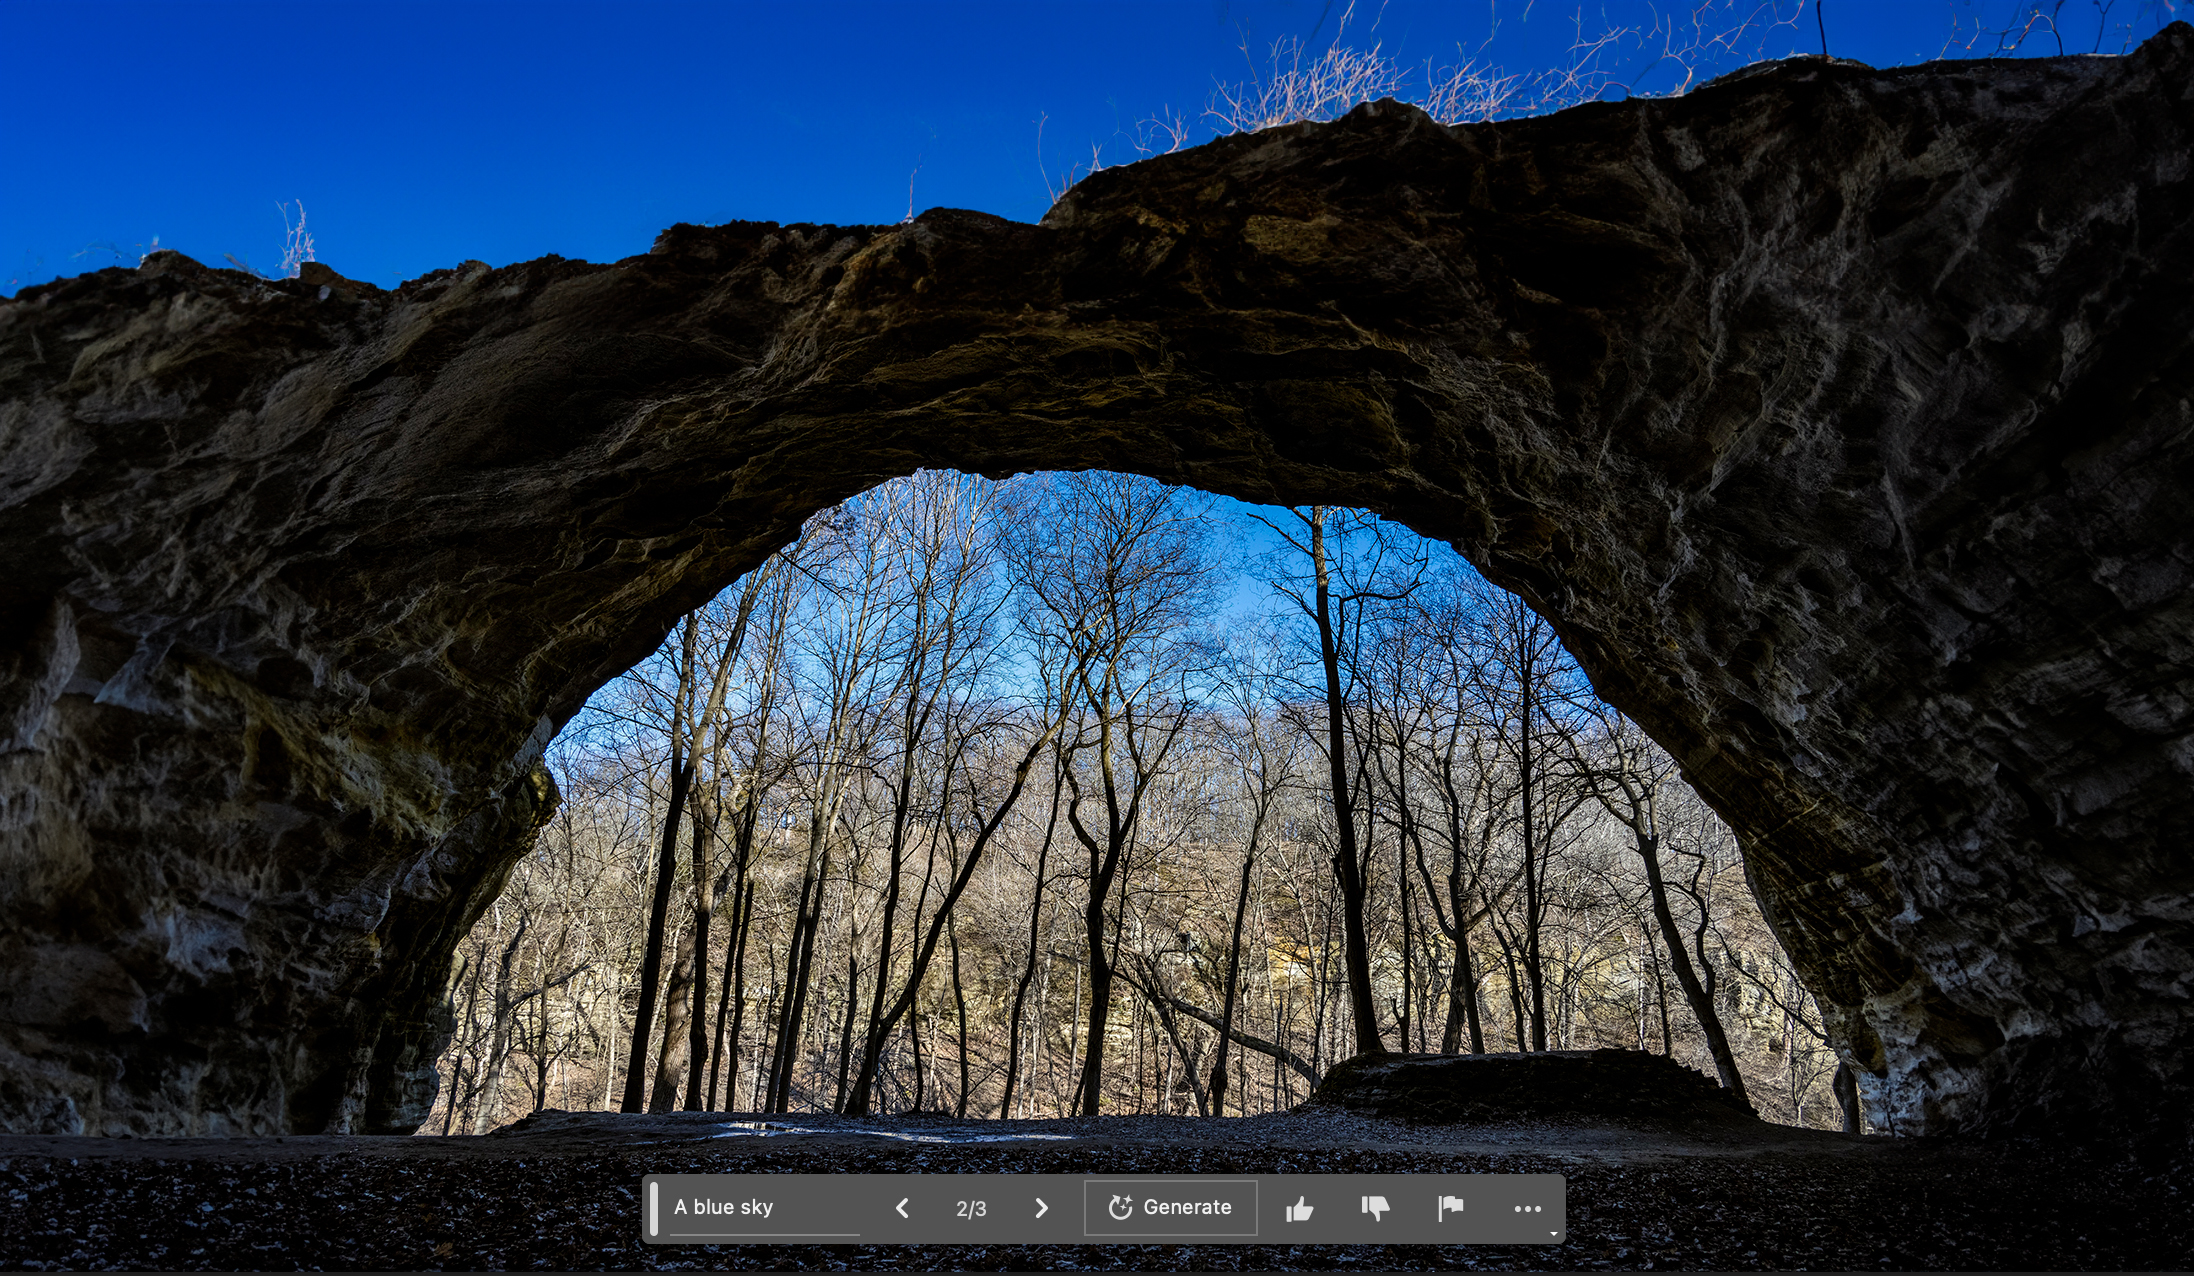
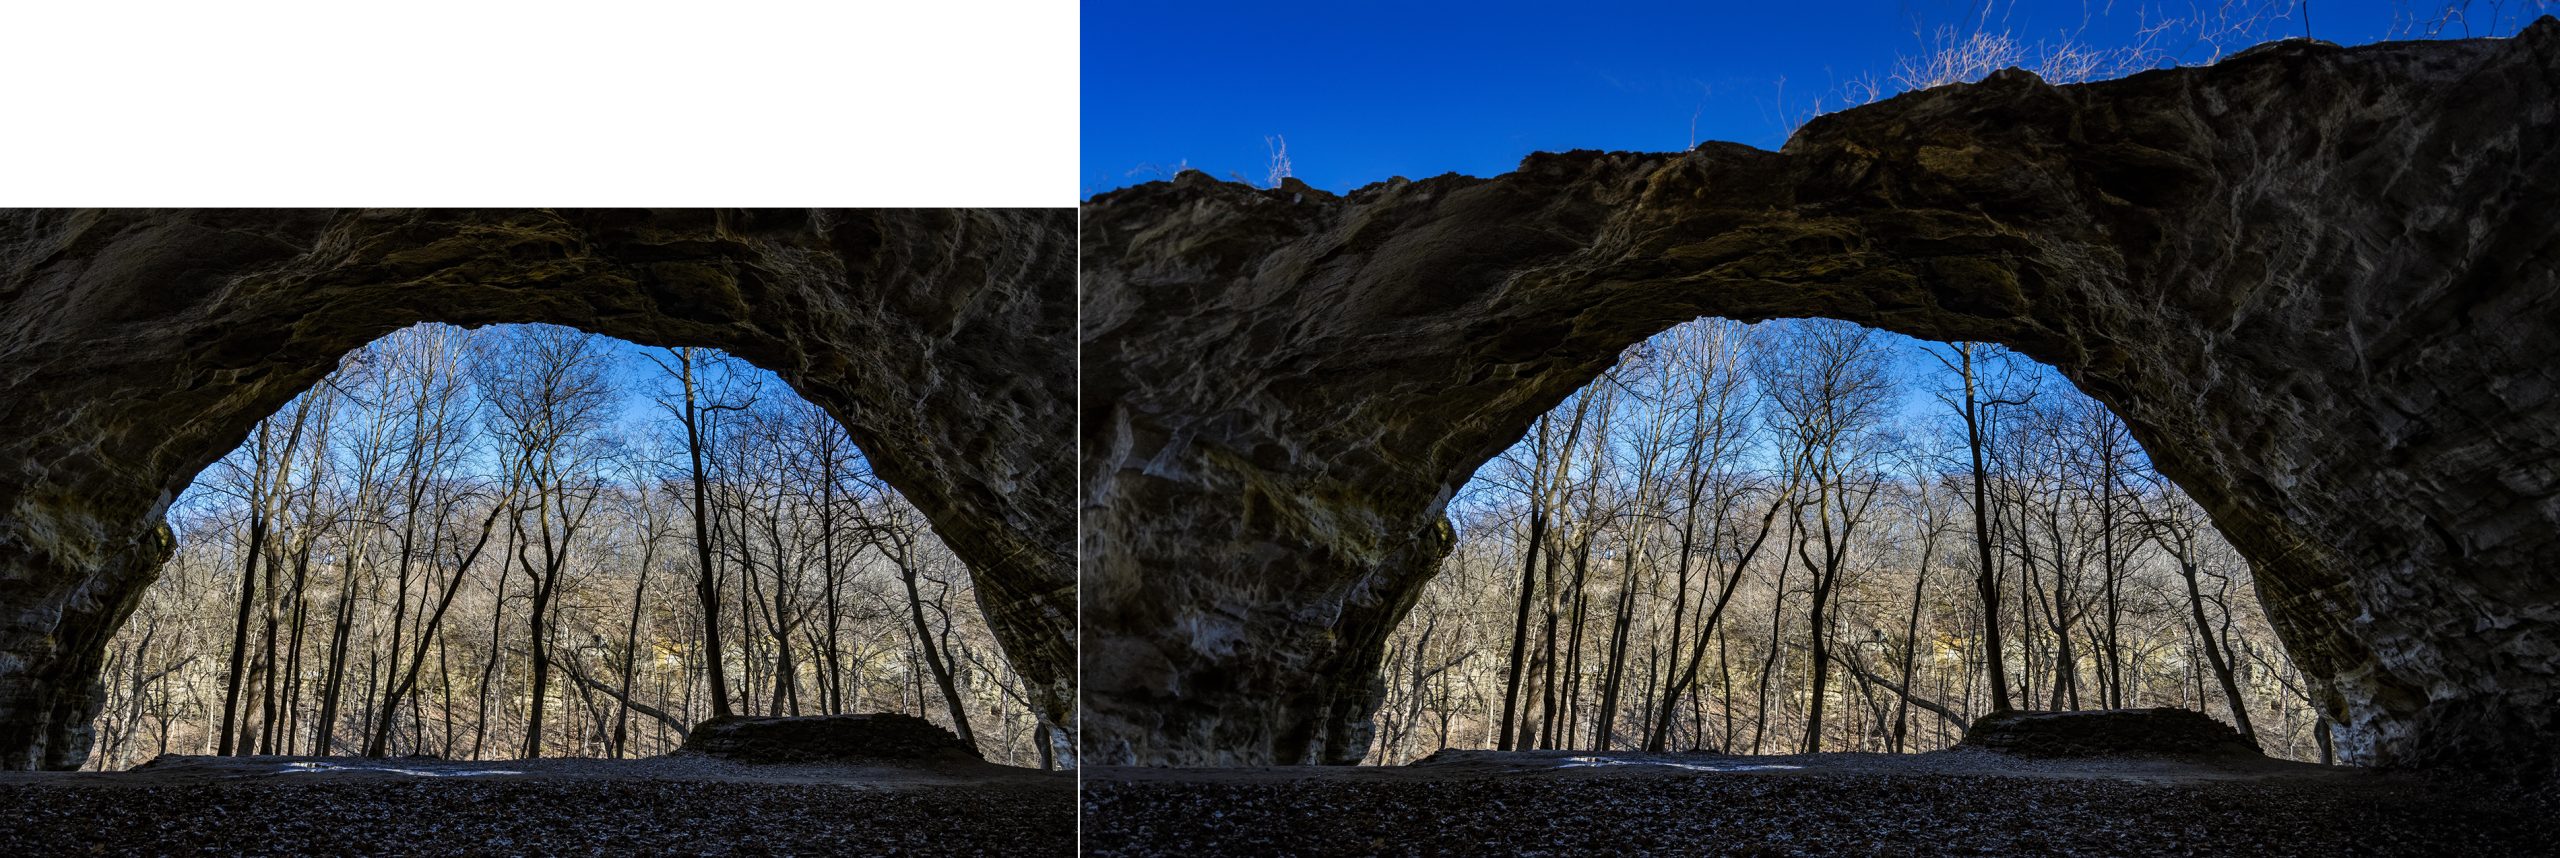
For the image below the canvas was increased on the top of the photo, a rectangular selection was made to cover the entire area including some of the original pixels, but this time I added a very simple prompt of ‘a blue sky’. This was the only variation of the three that actually contained a blue sky. It isn’t bad, but it is also not perfect. Keep in mind that the technology is new and that it is continuously learning, so it will become better, but some images and prompts may still create confusion where the results may not work well so you should expect a bit of frustration when working in AI.
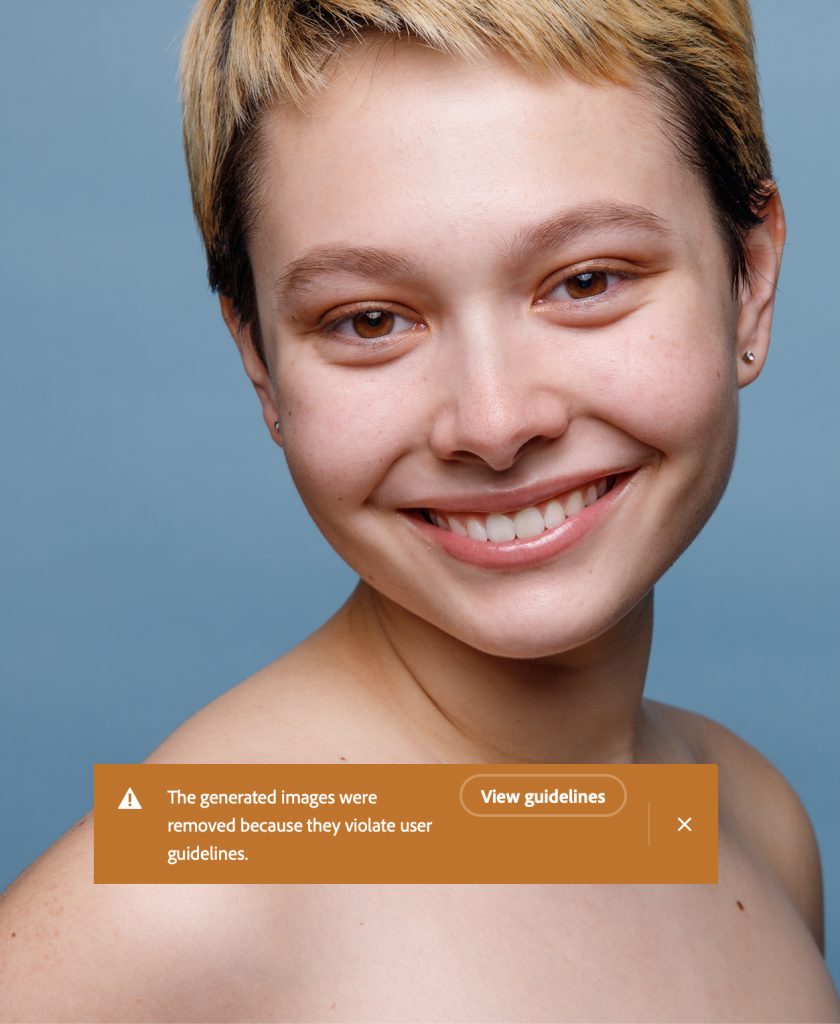
In the previous example I used a landscape photo, but you can use any photo that you like including portraits, however, some portraits may not work if there is too much skin showing as they may violate user guidelines. In the image below of Brianna King, Gen Fill assumed that she was nude and immediately flagged it.
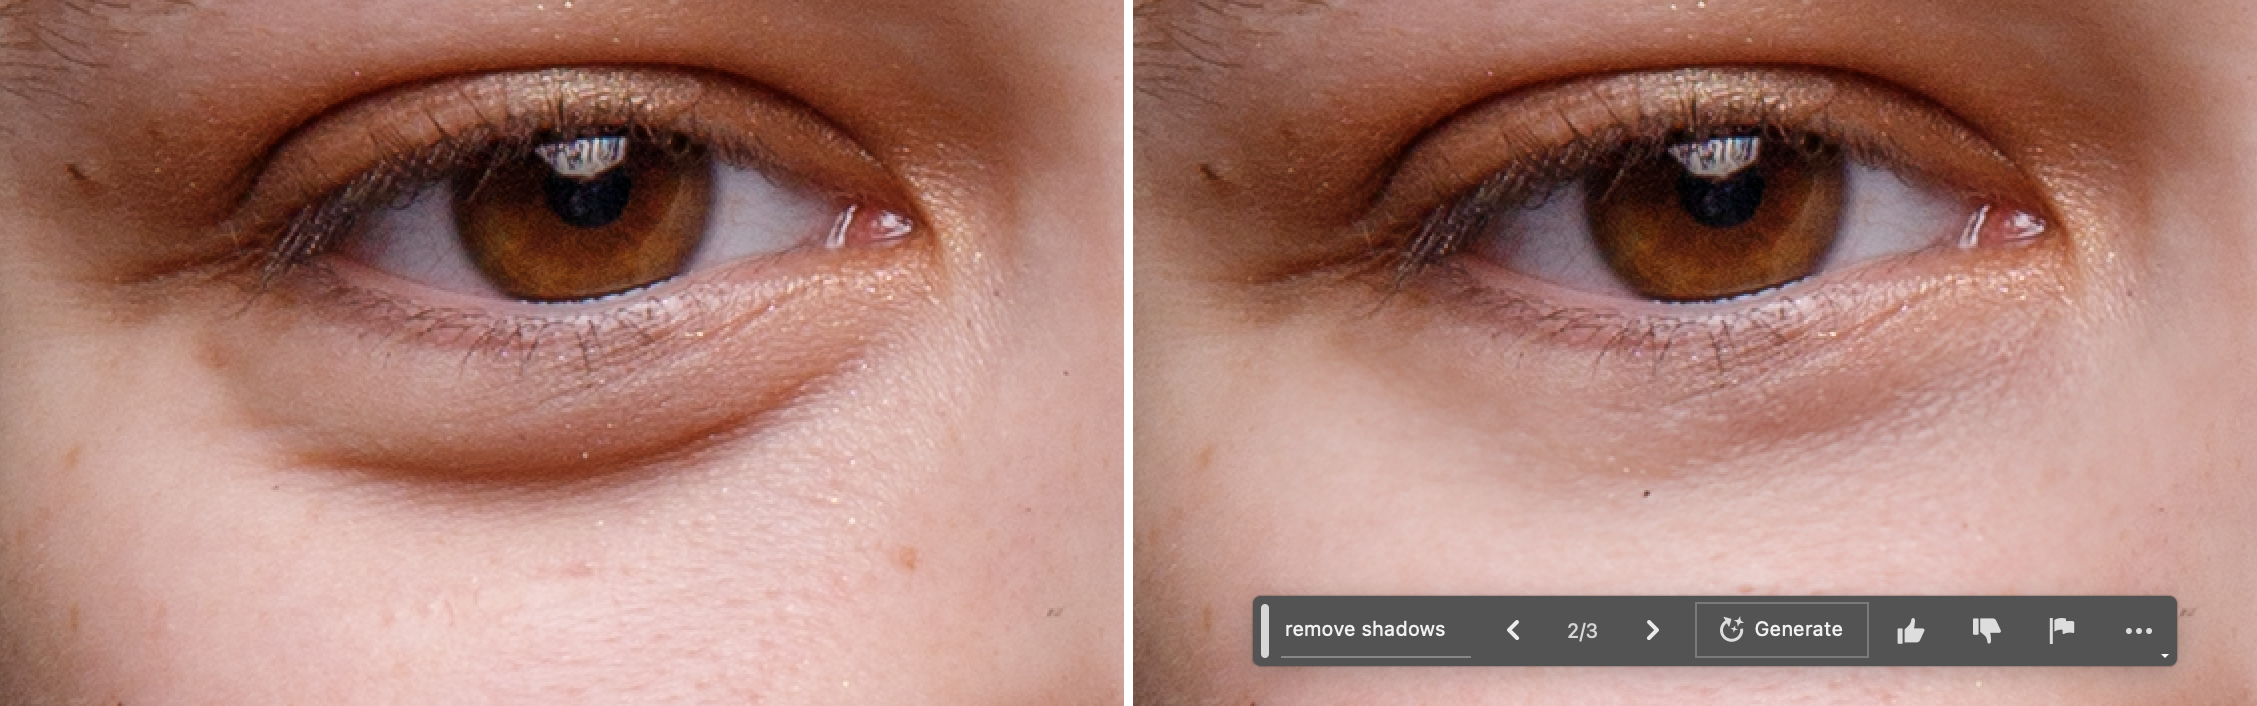
In Figure 4.10 I experimented with retouching to lighten the shadow under the eye. I made a loose selection around the shadow area and then used Generative Fill without a prompt but once again I had received the violation notice as seen in Figure 4.9. I then added a simple prompt of ‘remove shadows’ , and it worked to cut down on the shadow. The results were not perfect, but they definitely offered a great starting point, and more importantly demonstrate how this option can also work to retouch photos and get us to think more creatively on how we can use this artificial intelligence on our images.
Generative Expand
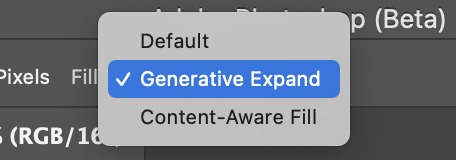
In the first iteration of the Generative tools, only Generative Fill was available so it was required to increase the canvas of an image if you wanted to increase the size and extend the background. Shortly after however, Adobe has added Generative Expand, which works the same as Generative Fill by generating new pixel information to add to an image, but it makes the entire process easier. With Generative Expand you use the Crop Tool to increase the canvas and add to the background in one move, versus adding canvas and making selections as we had to do with Generative Fill. To ensure that you are using the Crop Tool properly you will want to ensure that you have selected Generative Expand from the Fill menu in the Options Bar. The crop is set to work as normal when the Default setting is selected, and you can also choose to fill with pixels from within the image with the Content-Aware Fill option.
Using Generative Expand
Using Generative Expand is as easy as expanding one, or all four sides of the crop tool on an image, as seen below.
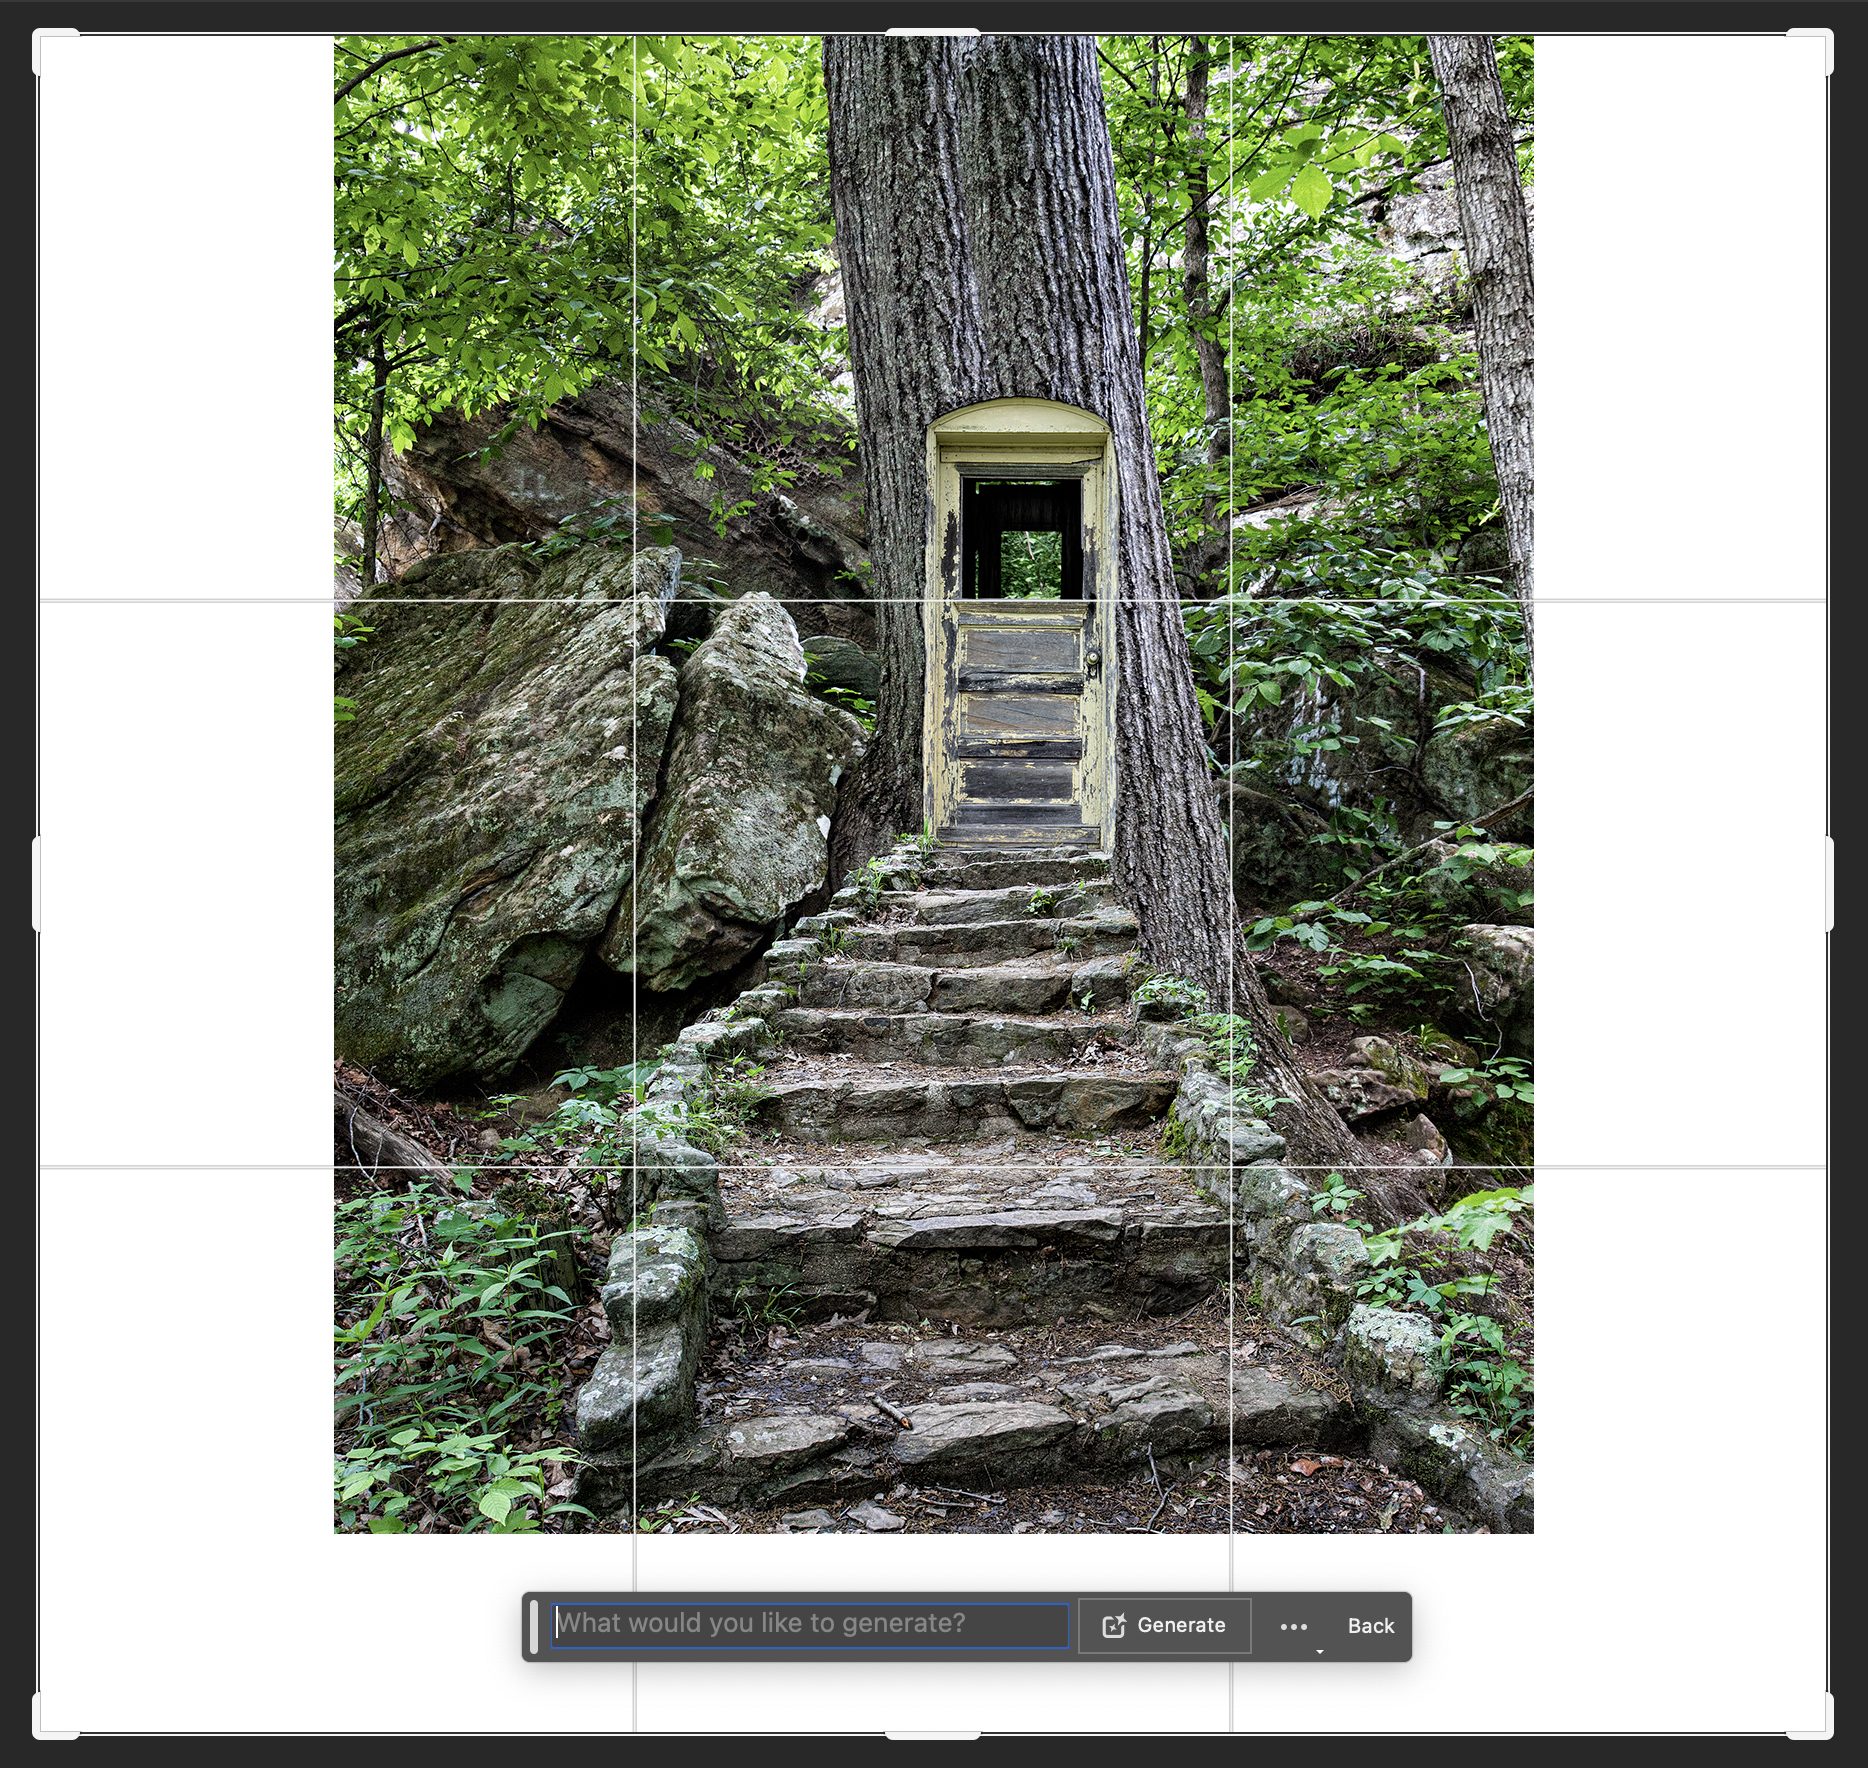
Use the Crop tool to increase the canvas, versus cropping into the image, and when you have the crop handles in the position that you like, press the Return key, click the Generate button in the Contextual Bar, or click on the Commit Current Crop Operation icon [checkmark] in the Options Bar and Photoshop will generate new pixels to fill the area.
![Three variations are generated and shown in the Properties panel [inset] when the crop is applied.](https://cod.pressbooks.pub/app/uploads/sites/140/2023/01/genexpand3.jpg)
When using Generative Expand or Fill, Photoshop produces three variations that can be toggled between to choose the best one. If none of the initial three variations are to your liking you can regenerate to produce three new variations by clicking the Generate button in the Contextual Bar or the Properties panel.
Generative Resolution
The image above brought oohs and ahhs, when I demonstrated both Generative Fill and Expand at a photography conference to add to all four sides of the image. I could have dropped the mic and walked away, but I took the opportunity to talk about resolution, specifically AI resolution. At the time of this writing, the Gen AI options can create images up to 2000 x 2000 pixels. Using an output resolution of 240 ppi as learned in chapter 2 on Resolution, This will yield an image of 8.333″ x 8.333″, which is not bad if printing on letter-sized paper; however, the original image contains four times the resolution where I can easily produce a 24″ x 30″ print. As I zoomed into the image at 100% magnification, we could easily see that the newly generated pixels did not match the clarity and pixel structure of the original. On screen it was great, but there simply were not enough pixels to match the original. Please keep this in mind when using these options, as they are definitely creative tools, but they may not well in every project. FYI, there are third party apps that can be used to increase the resolution of the generated pixel information, but they may not work perfectly either.
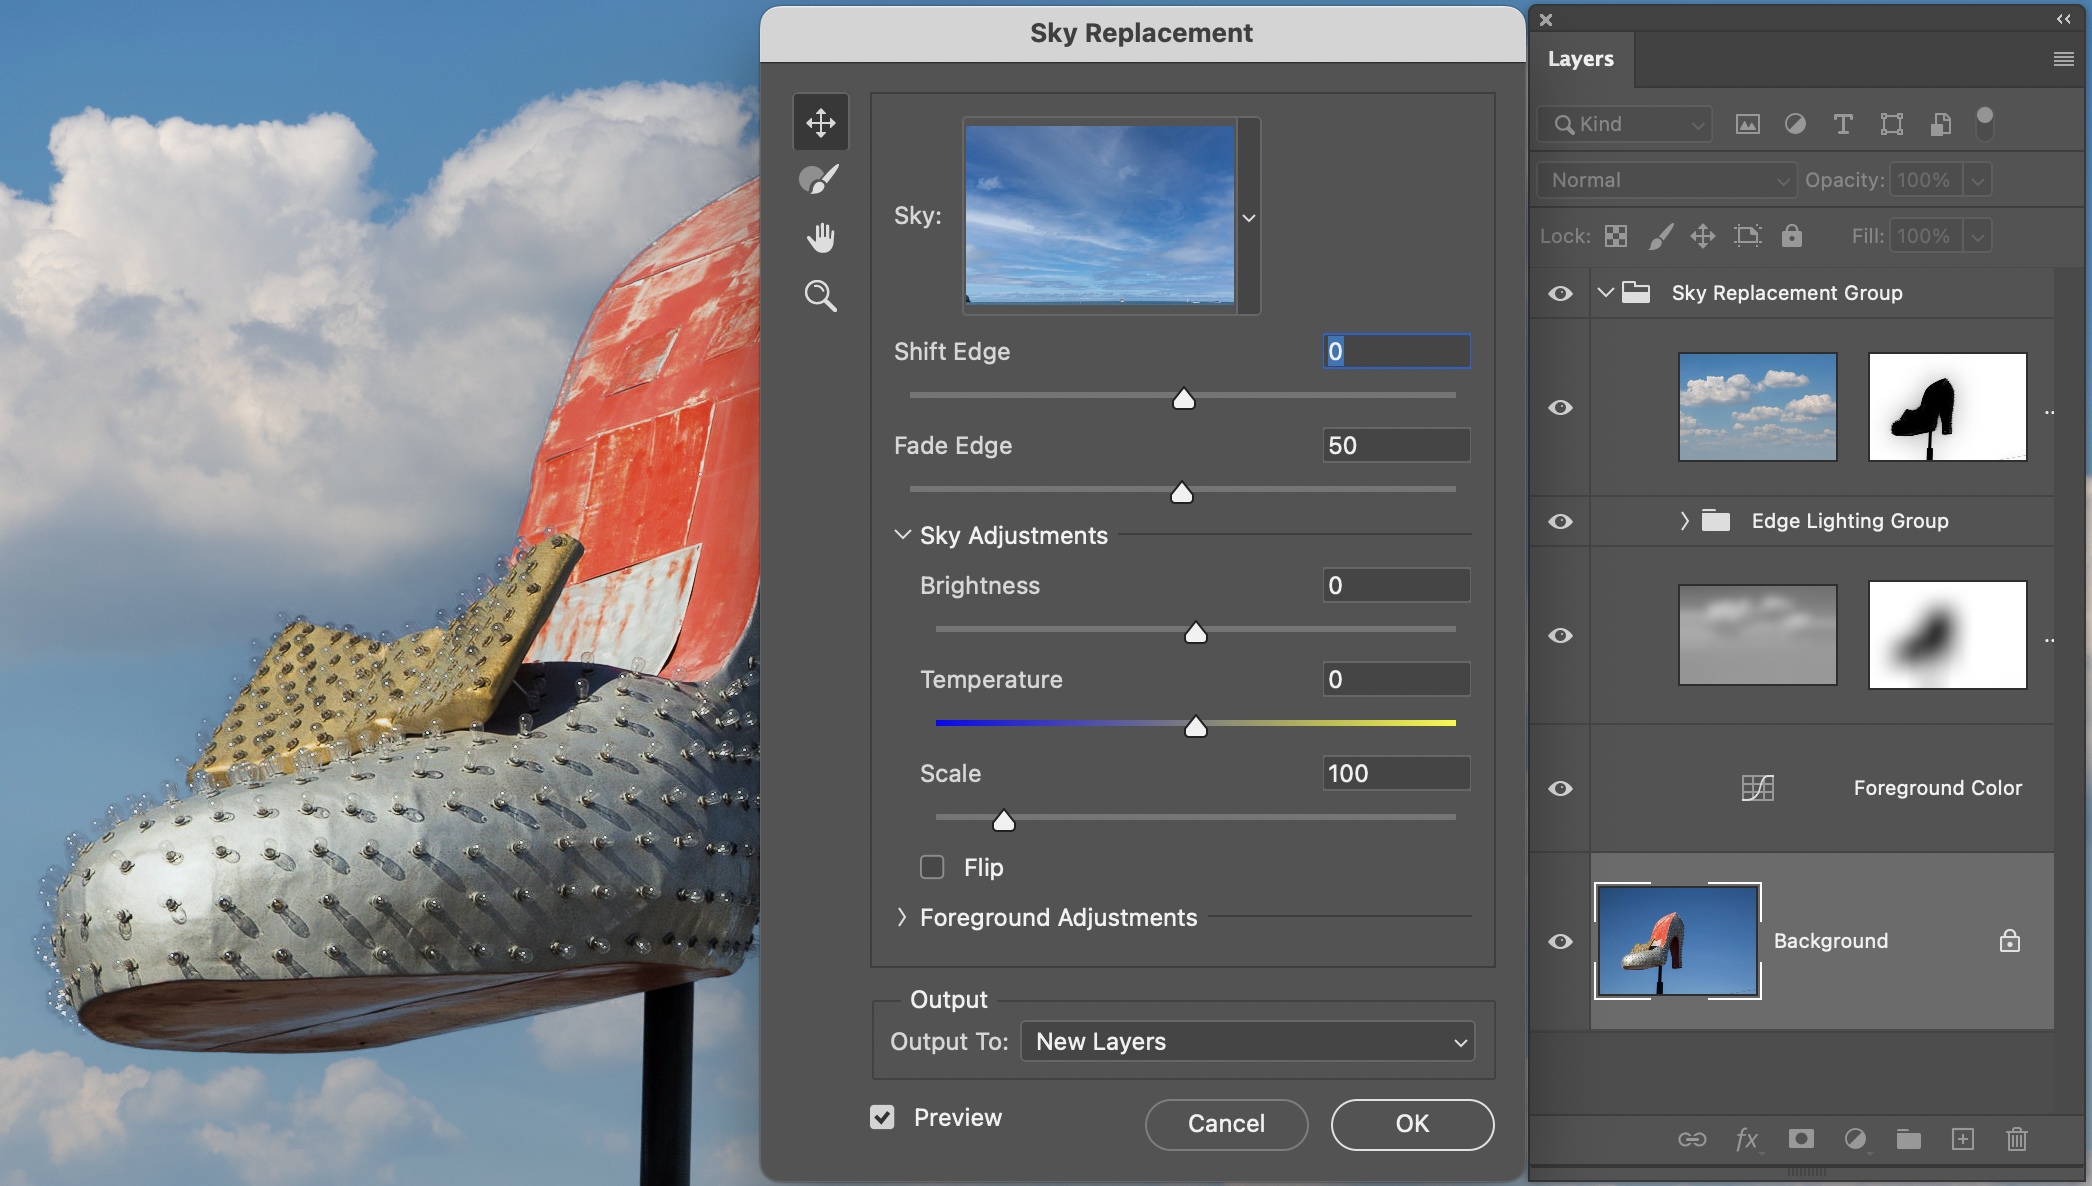
Sky Replacement
The Sky Replacement option allows you to enhance skies in your photos by replacing them with a collection of available skies in the dialog box, or you can add one of your own. This option does not require a selection to be made before using it as you may have done in the past. Instead, Photoshop uses Adobe Sensei Generative AI to mask and blend the images automatically for you. Even though you do not need a selection to use Sky Replacement, after you hit OK it does produce layer masks that can be used or saved as selections as described in Chapter 3.
Using Sky Replacement couldn’t be easier and you can get amazing results in just three steps [see Figure 4.14].
- Choose Edit > Sky Replacement.
- Choose the sky you would like to replace from the Sky section of the dialog box. You can Import your own skies from here.
- Adjust the settings to get the perfect sky, and hit OK.
As great as the AI options are in Ps you may not get the results that you like, and you might have to tweak them which can include adding to, or subtracting from the selection which may require the use of additional selection tools.
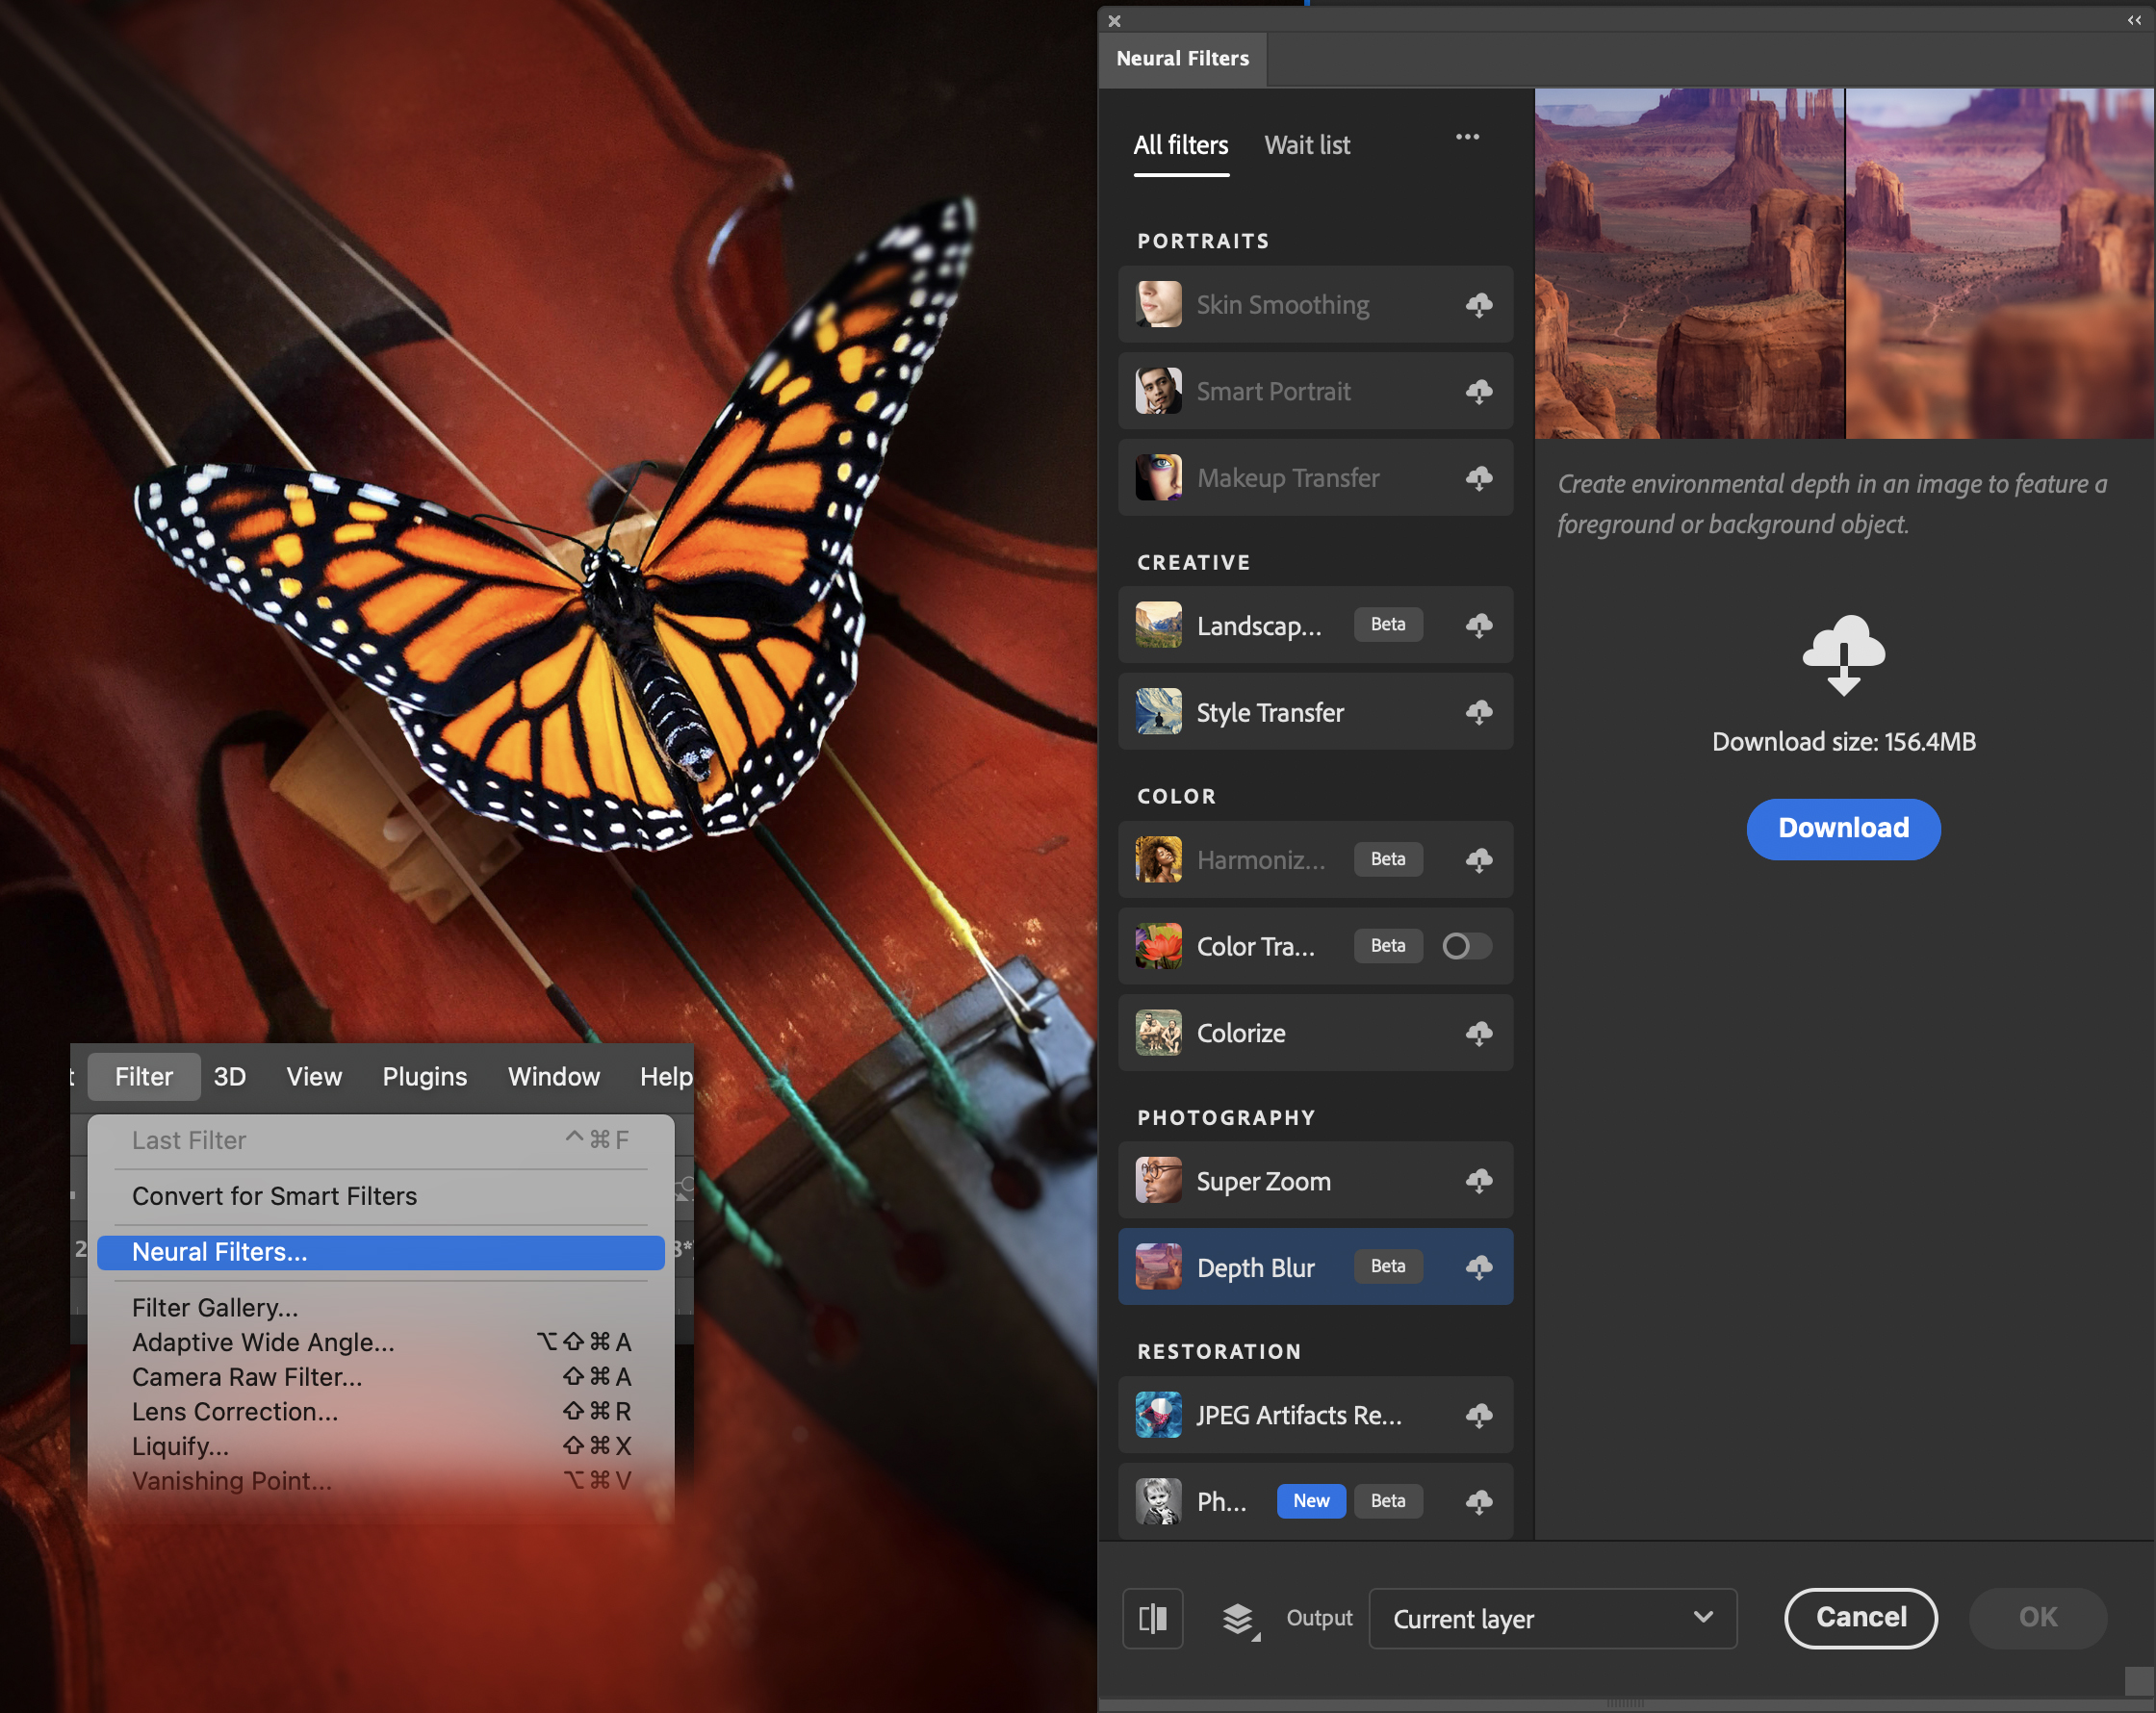
Neural Filters
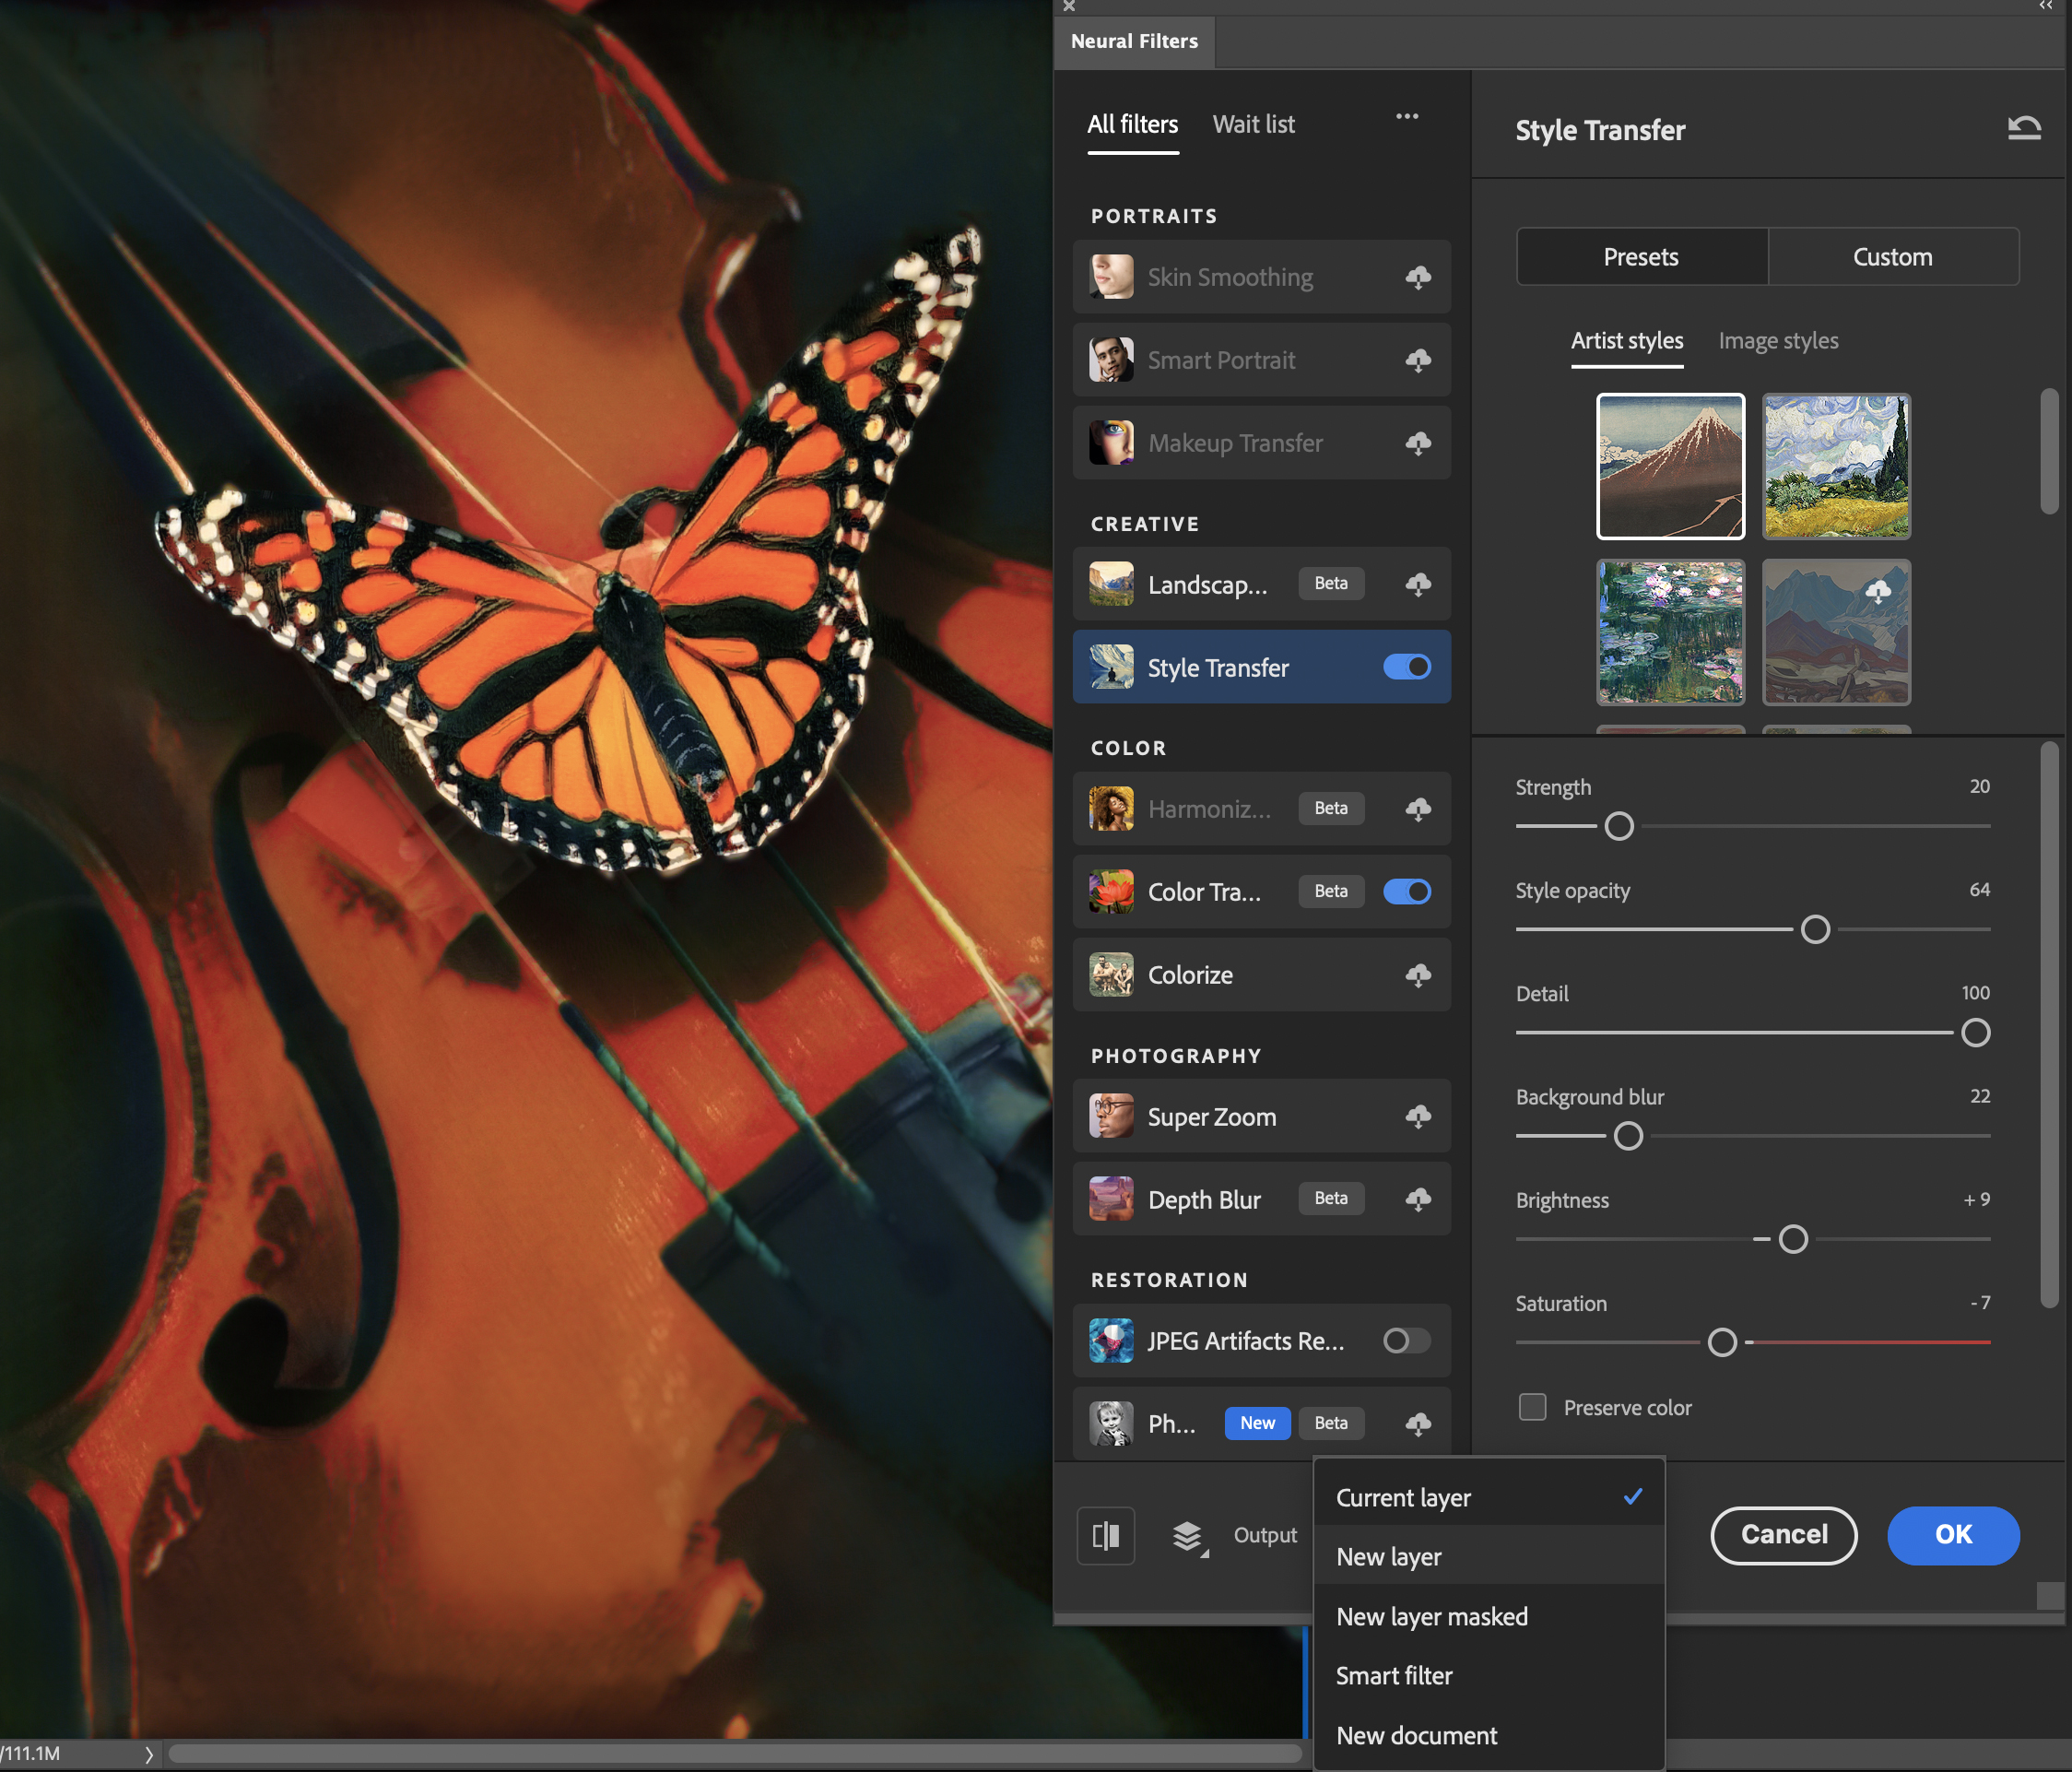
Neural Filters is a Photoshop workspace containing a set of filters that are intended to make workflows easier by using machine learning powered by Adobe Sensei. These filters allow you to try non-destructive, generative filters and explore creative ideas while quickly moving through some otherwise tedious tasks, like Skin Smoothing. Neural Filters help you improve your images by generating new pixels that are not present in the original.
Neural Filters can be accessed from the Filter menu, and the first time you use them you will need to download them from the cloud. Notice the cloud icon on the right of the name of each filter in Figure 4.15, with some newer filters added as Beta filters for you to experiment with.
Once a filter is downloaded you will have the option to keep it on or disable it, use Presets to apply to your photo, or use additional sliders to fine tune the results. Be sure to monitor the Wait List tab on the upper left for new filters to request. When you are happy with your results, you can choose how you want to Output the results where they can be applied to the image layer itself, a New Layer, as a Smart Filter or to a New Document.
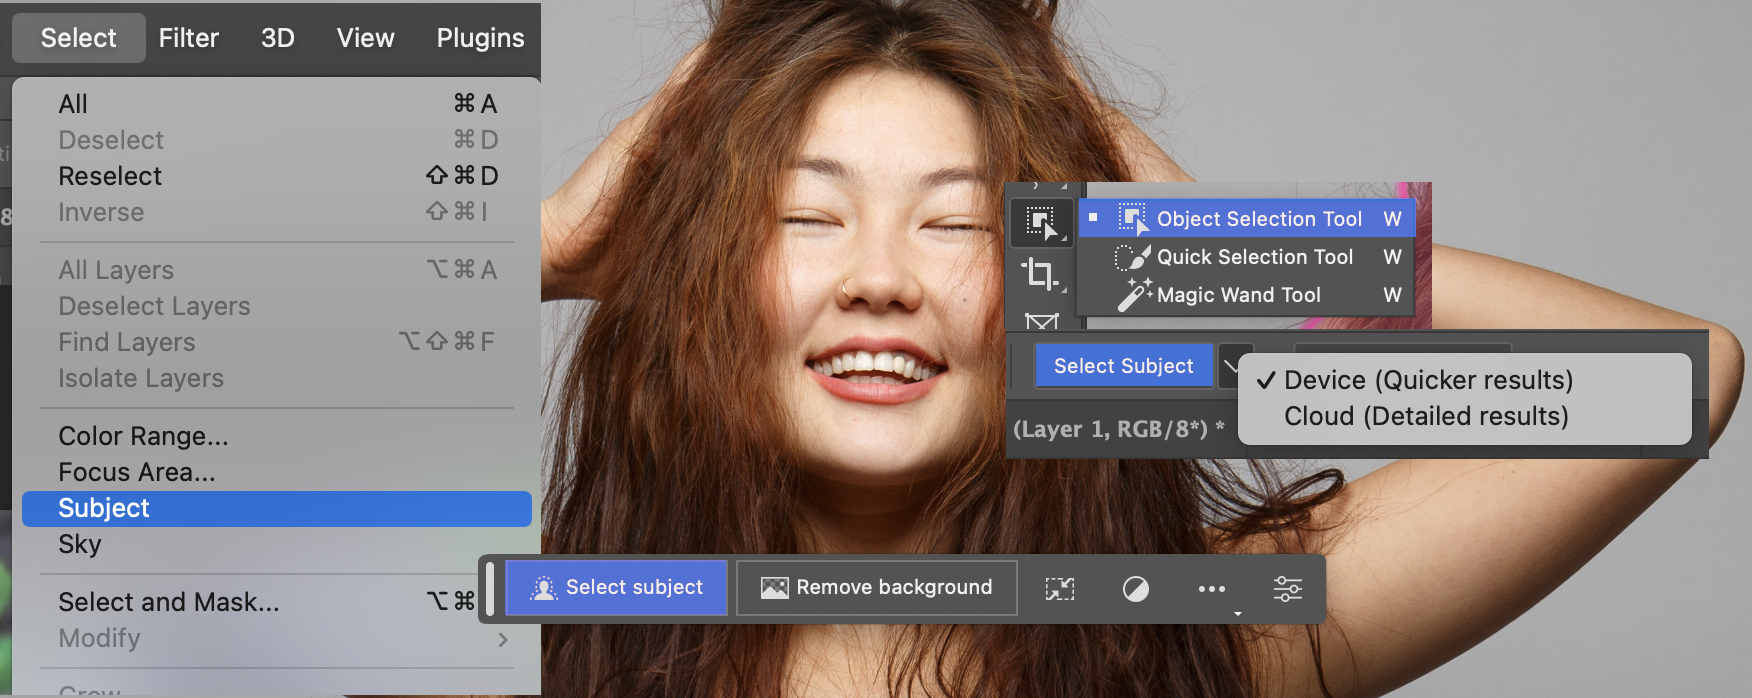
Select Subject
Making good selections is one of the most challenging, time-consuming, and beneficial skills to have in Photoshop, and there are various ways to make selections as discussed in the previous chapter as well as in the next chapter. The Select Subject button uses Adobe Sensei and machine learning as an option to produce great results with a single click. The Select Subject option can be accessed from the Select Menu, the Contextual Task Bar, the Options Bar for the Object Selection Tool, and it can also be found in the Select and Mask Workspace as seen in Figure 4.19.
When using Select Subject you can choose to have the tool make faster selections by working directly in Ps on the Device you are currently working on, or you can choose to have it produce a detailed result by choosing the Cloud option. The default is Device [Quicker results], but you can change the default option to use Cloud [Detailed results] in Preferences [Preferences > Image Processing > Select Subject Processing > Cloud / detailed results]. When using the Cloud option, Ps uses Sensei with image matching from millions of cloud-based photos to understand their composition and meaning, and then applies this knowledge to your work, which in turn produces better results in comparison to the Device option, which is processed on the information within the image. This technology is great and is continuously learning although the results may not be perfect, and you may need to refine the selection..
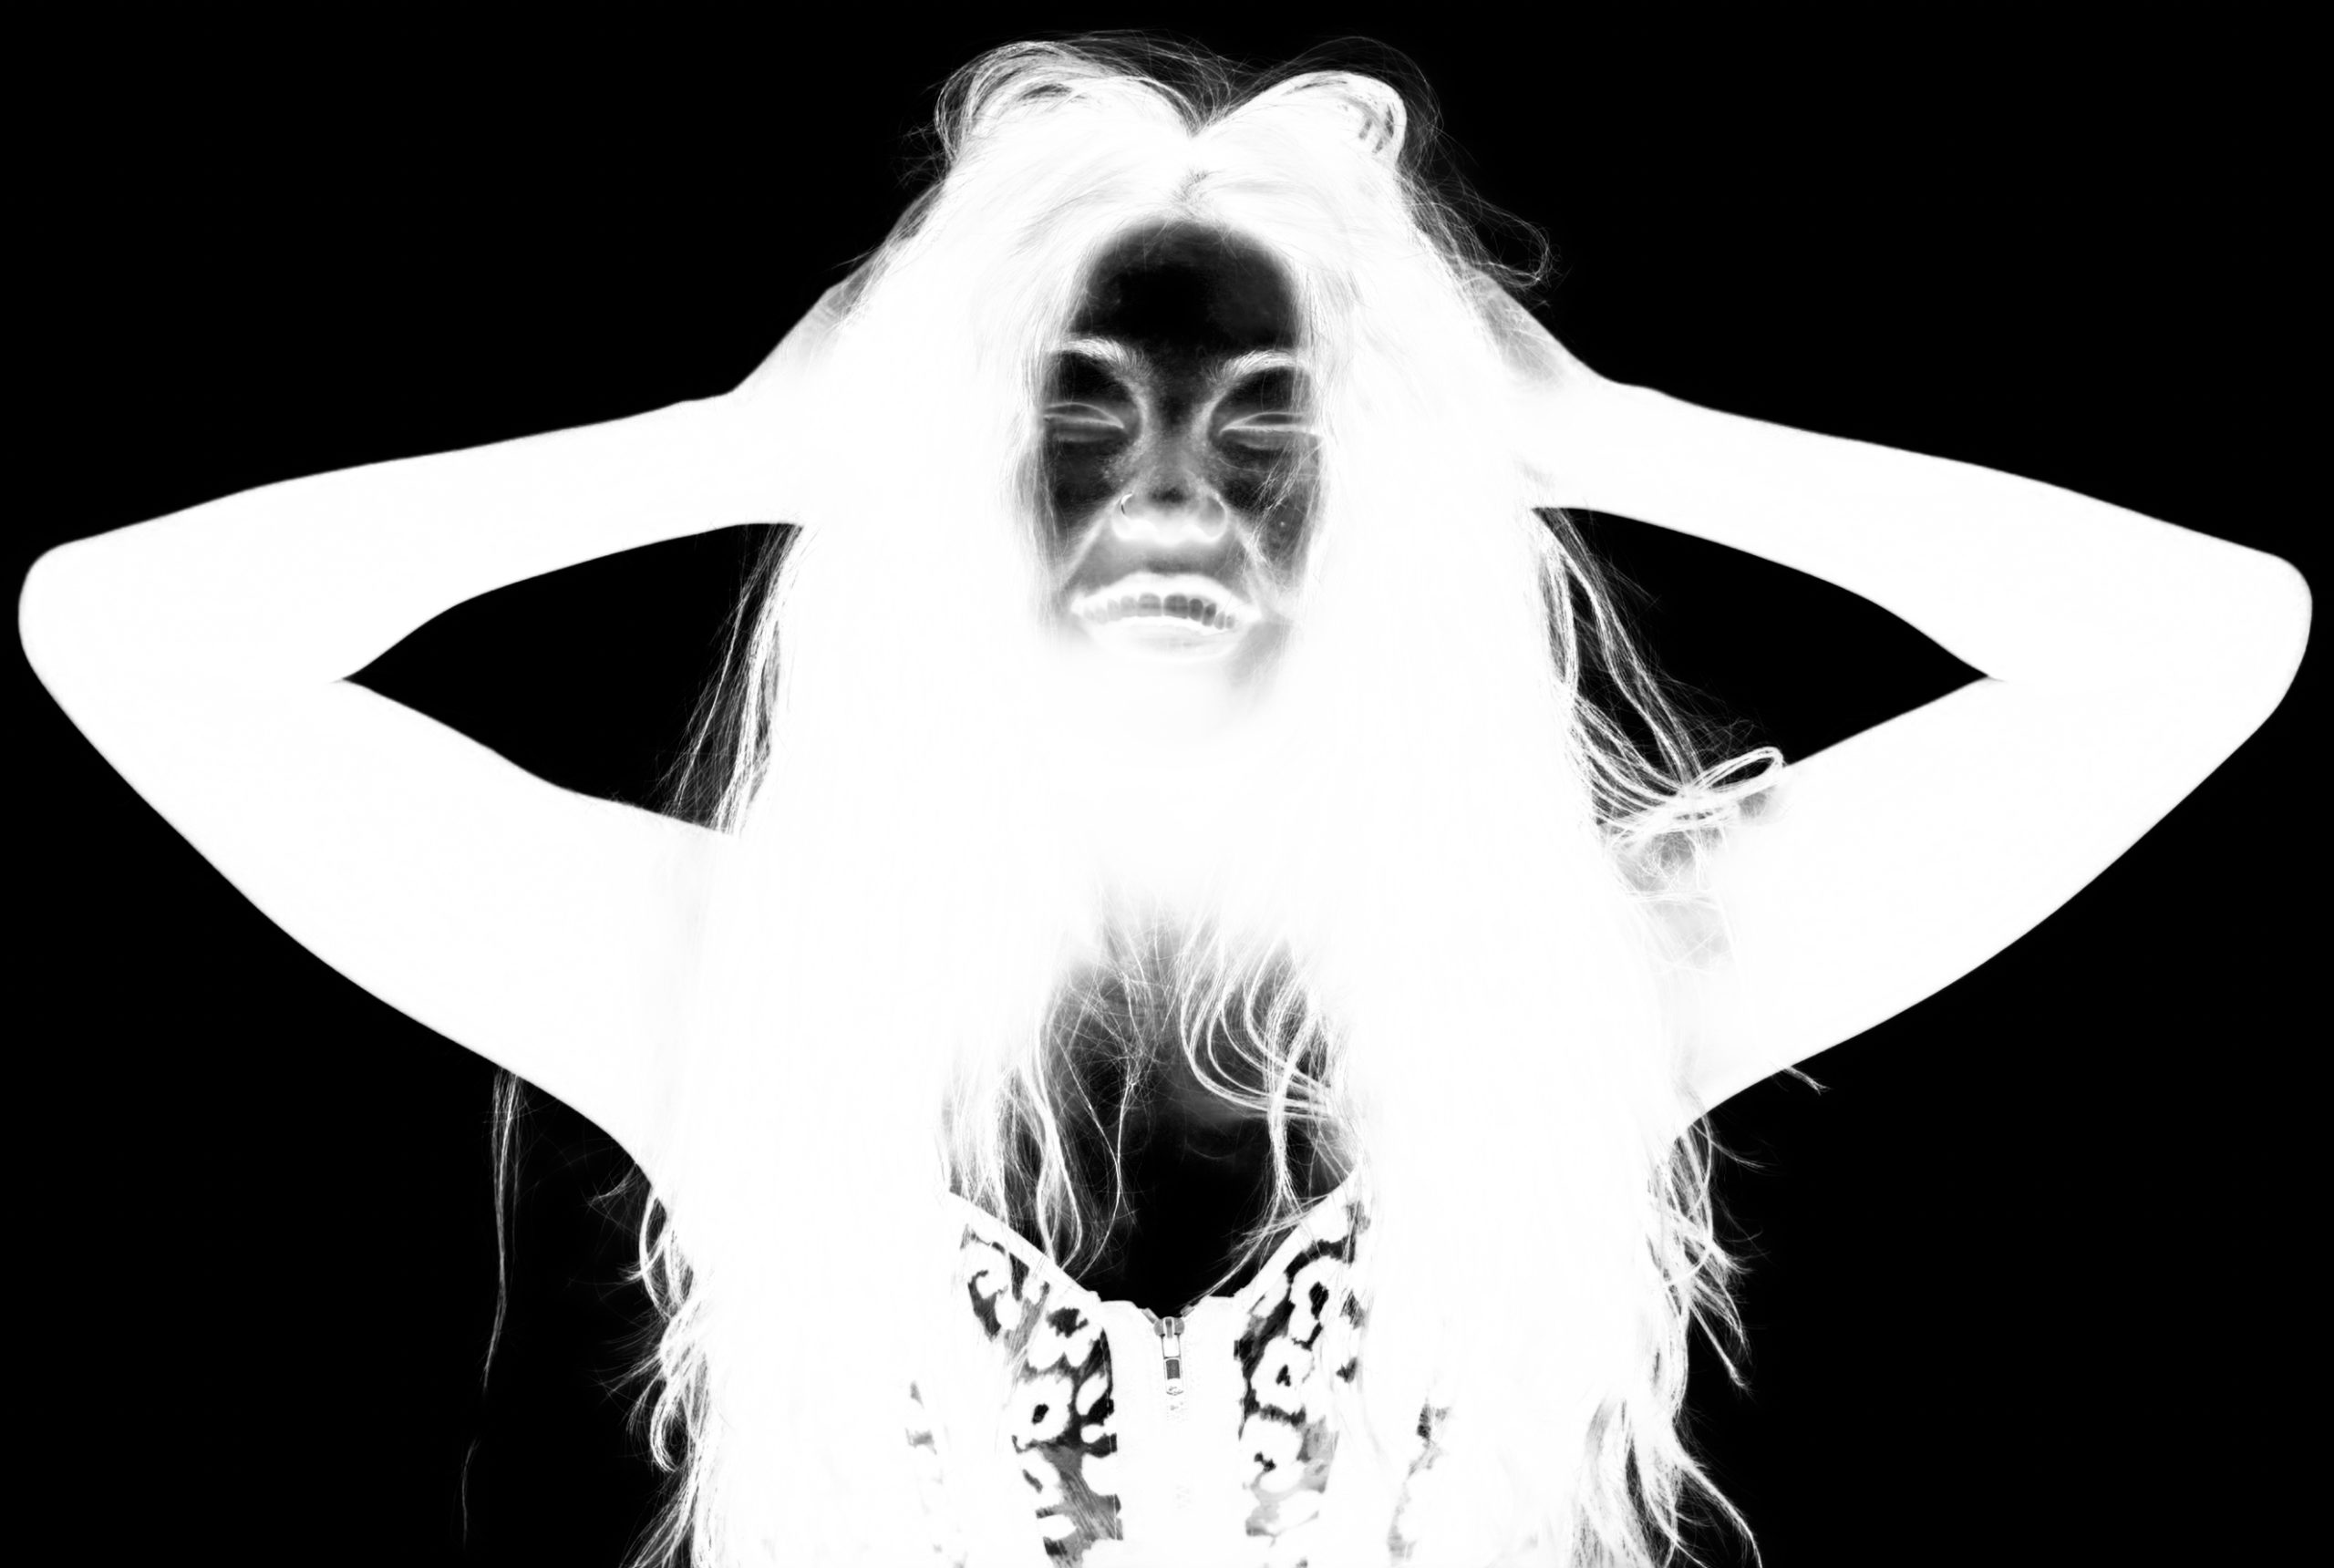
In the image below I chose to show the mask so you could see in black and white where the selection was made [white] and the areas that were not selected [black]. The selection of the subject is not bad around the outside but you can see where the hands meet the hair that the tones are gray indicating that it is partially selected. You will also notice that the face and chest area have quite a bit of black indicating that those areas are not selected. To me, this area is not a concern because we can use the Lasso Tool to make a quick selection and then fill it with white, but the bigger concern is the area that separates the subject from the background which includes the hair and the the hands. We’ll see how to refine these selections in the section below, but I also want to point out that this was the first attempt at making a selection on this image. I had deselected and made a second selection using the same method, and on the second attempt the face and chest were included in the selection.
Refine Edges
Two additional AI options in Photoshop are the Refine Hair and Object Aware, that can both be found in the Select and Mask workspace. The Select and Mask workspace can be used to refine any selection, and will be covered in more detail in the next chapter on Selections, but I will point out how these two AI options work.
First, there are two Refine Modes that we can work between; Color Aware and Object Aware. Use Color Aware mode for simple or contrasting backgrounds, or use the Object Aware mode for hair or fur on complex backgrounds. Either of these modes will work with the Refine Hair option, but it is recommended to switch the mode to Object Aware, but either mode will work. To use the Refine Hair option all you really need to do is click on the button at the top and wait for the results. If you find that the results were not to your liking, click the Refine Hair button again and it will reevaluate and create a new selection.
You may still find that the final selection is still not to your liking after using the various Select and Mask options, so you can try some of the other Selection tools or methods in the next chapter, or practice working with Alpha Channels and some of the selection methods discussed in the previous chapter to further refine selections.

Two other bits of Photoshop AI can be found in the Retouching chapter of this book where they are both described. The first is Neural Filters found under the Filter > Neural Filters… menu. The second is the Masking section of the Camera RAW app as described in Person Masking [AI]. This option is accessible when you open RAW photos directly in PS, or after opening a Smart Object from Lightroom with the Photo > Edit In > Open as Smart Object in Photoshop menu option.
